Previous
Getting Started - PhotoRobot User Support Manual


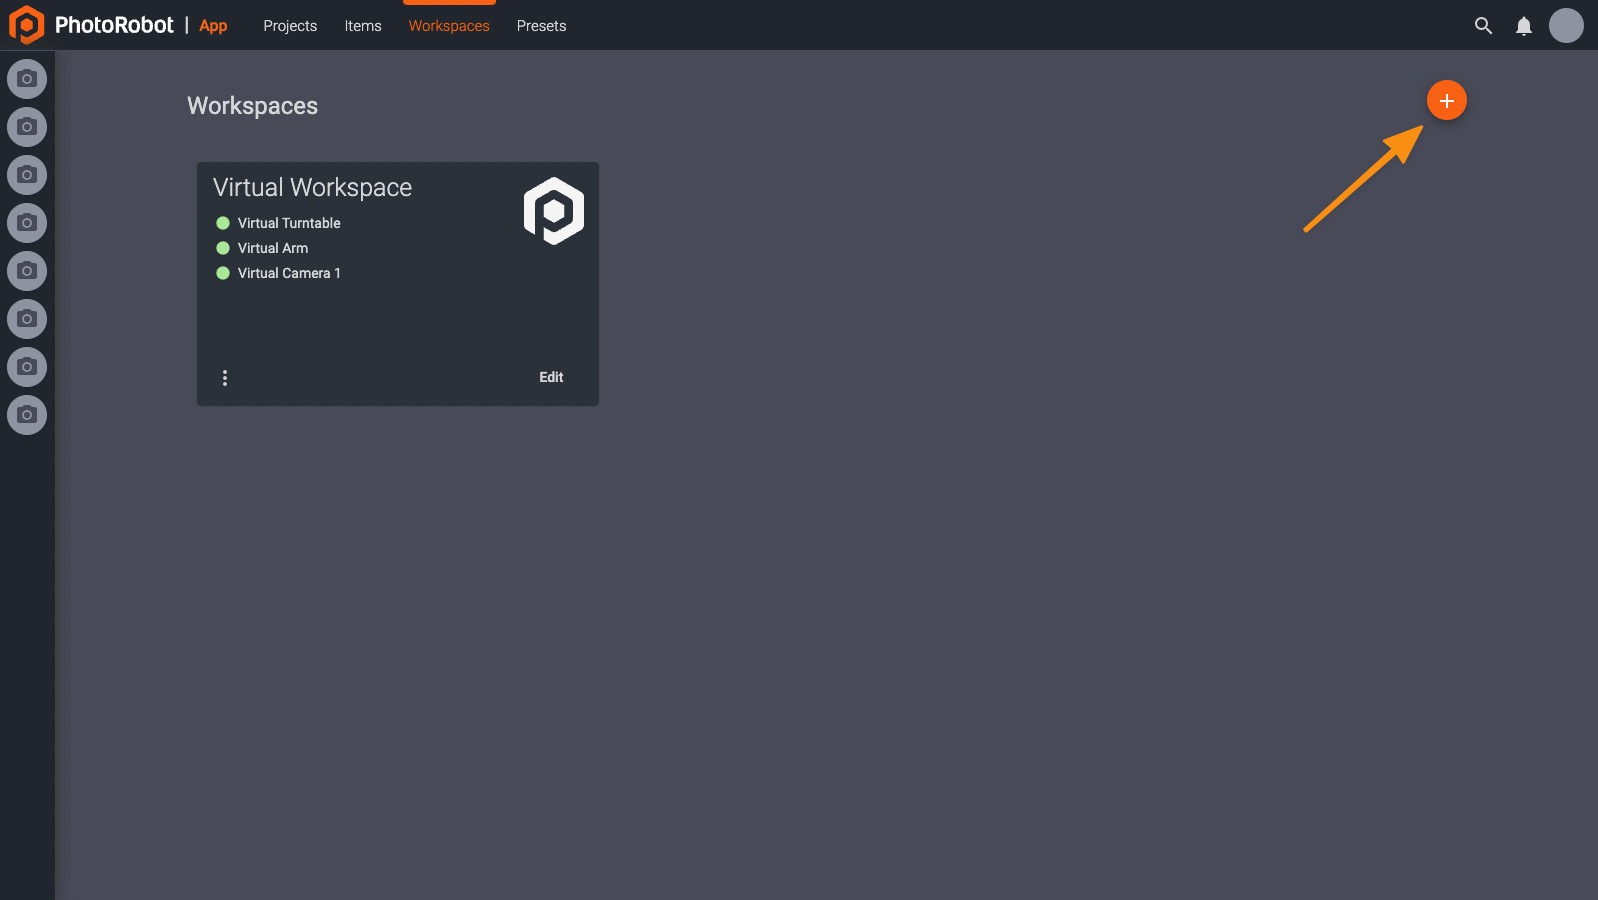
In the PhotoRobot Controls App (further referred to as “CAPP”), the first user step is to create a Workspace. A workspace is a list of hardware that will be used for a specific photoshoot. One can include various PhotoRobot modules, cameras, lights, and other accessories.
For demo purposes, it is also possible to work with a predefined Sample Workspace, which is configured to use virtual hardware. The Sample Workplace enables users to experiment with various features in CAPP by selecting virtual robots and cameras.
To create a workspace, go to Workspaces and press the create button:
In the next step, ensure all robots for the photoshoot are turned on and connected to the same local area network as your computer. Then press Add robot.

To activate Fast-shot mode, connect any robots with a camera via a shutter cable.
( ! ) - For other manufacturers, it might be necessary to use slot 1.

Depending on the hardware in use, there are several options to configure lasers:
Both the Case 850 and the 1300 have laser systems designed into the robot with zero configuration required.
The 20-port LaserBox is a standalone device which enables control over multiple lasers via network connection.
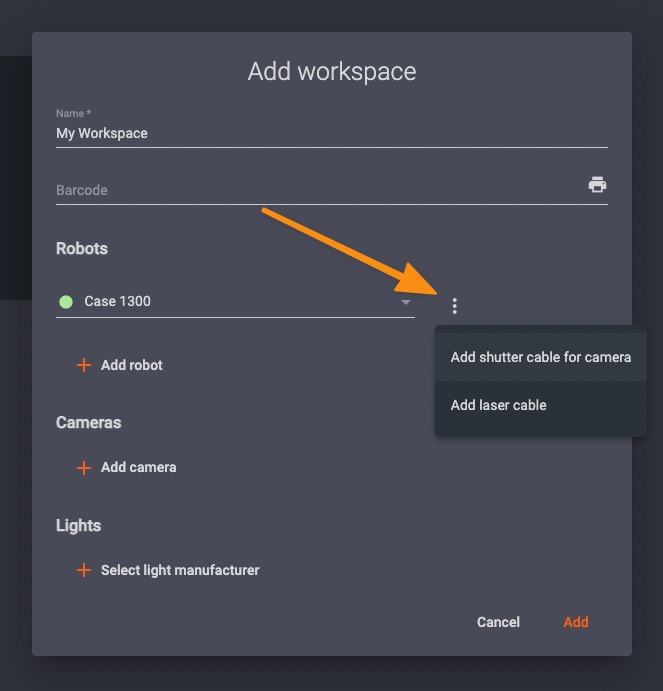
To configure the LaserBox, ensure first that it’s turned on, and then add it as another robot to the workspace:

If you have a 4-port LaserBox connected to your robot, select Add laser cable in the 3-dot menu items to the right of the robot’s ID:
To add a camera, first ensure the device is turned on and connected via USB to the computer.
If you are not using a robot with swing capability (e.g. the Robotic Arm or the Frame), you will also need to set the angle at which the camera will target the table.
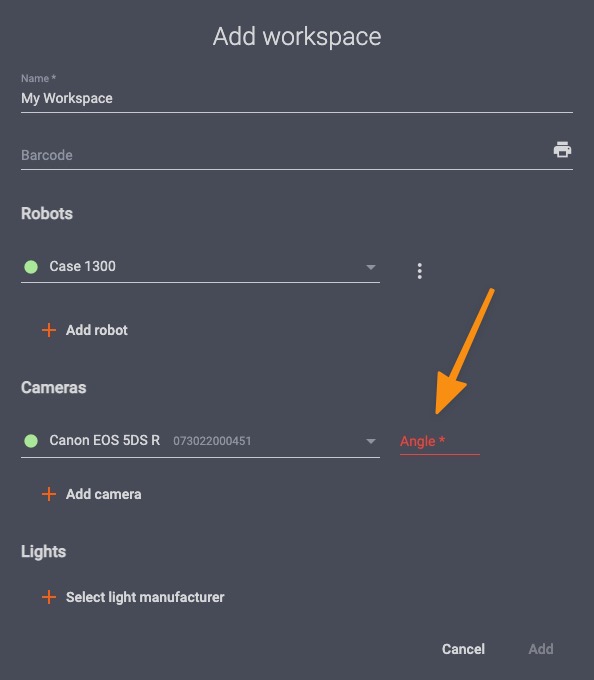
( ! ) - Setting the angle for robots without swing capability is necessary for certain features such as auto-centering to operate.
( * ) - See the complete list of PhotoRobot compatible cameras.
Light systems compatible with PhotoRobot include two types of lights: strobe lights from FOMEI and Broncolor, or any LED lights with DMX support.
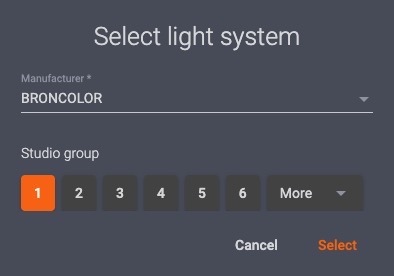
To configure a lighting setup in the workspace menu, go to Lights and add compatible lights in Select light manufacturer.
To set up Broncolor lights, select first BRONCOLOR, and then choose from the Studio group of lights you want control over:
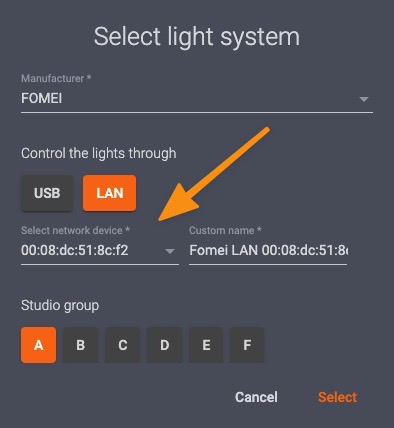
For lights by FOMEI, users have two control options:
FOMEI LAN Transceiver (preferred method)
For control over lights via FOMEI LAN Transceiver, ensure first that it is online and connected to your network.
Next, select LAN. Then, below LAN in the dropdown menu, select Fomei LAN Transceiver.
FOMEI USB dongle (legacy)
It is also possible to control lights with FOMEI’s WiFi dongle connected directly to your computer via USB.
( ! ) Be aware that this method is no longer recommended. This is due to the fact it requires additional drivers to be installed on your computer. FOMEI also no longer supports newer MacOS systems.
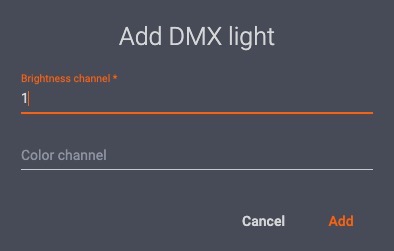
To control any LED lights compatible with DMX protocol, connect the lights via an RJ45 or USB cable to the robot.
You can then select Light manufacturer DMX.
Later, you will create an individual light at the Capture screen:
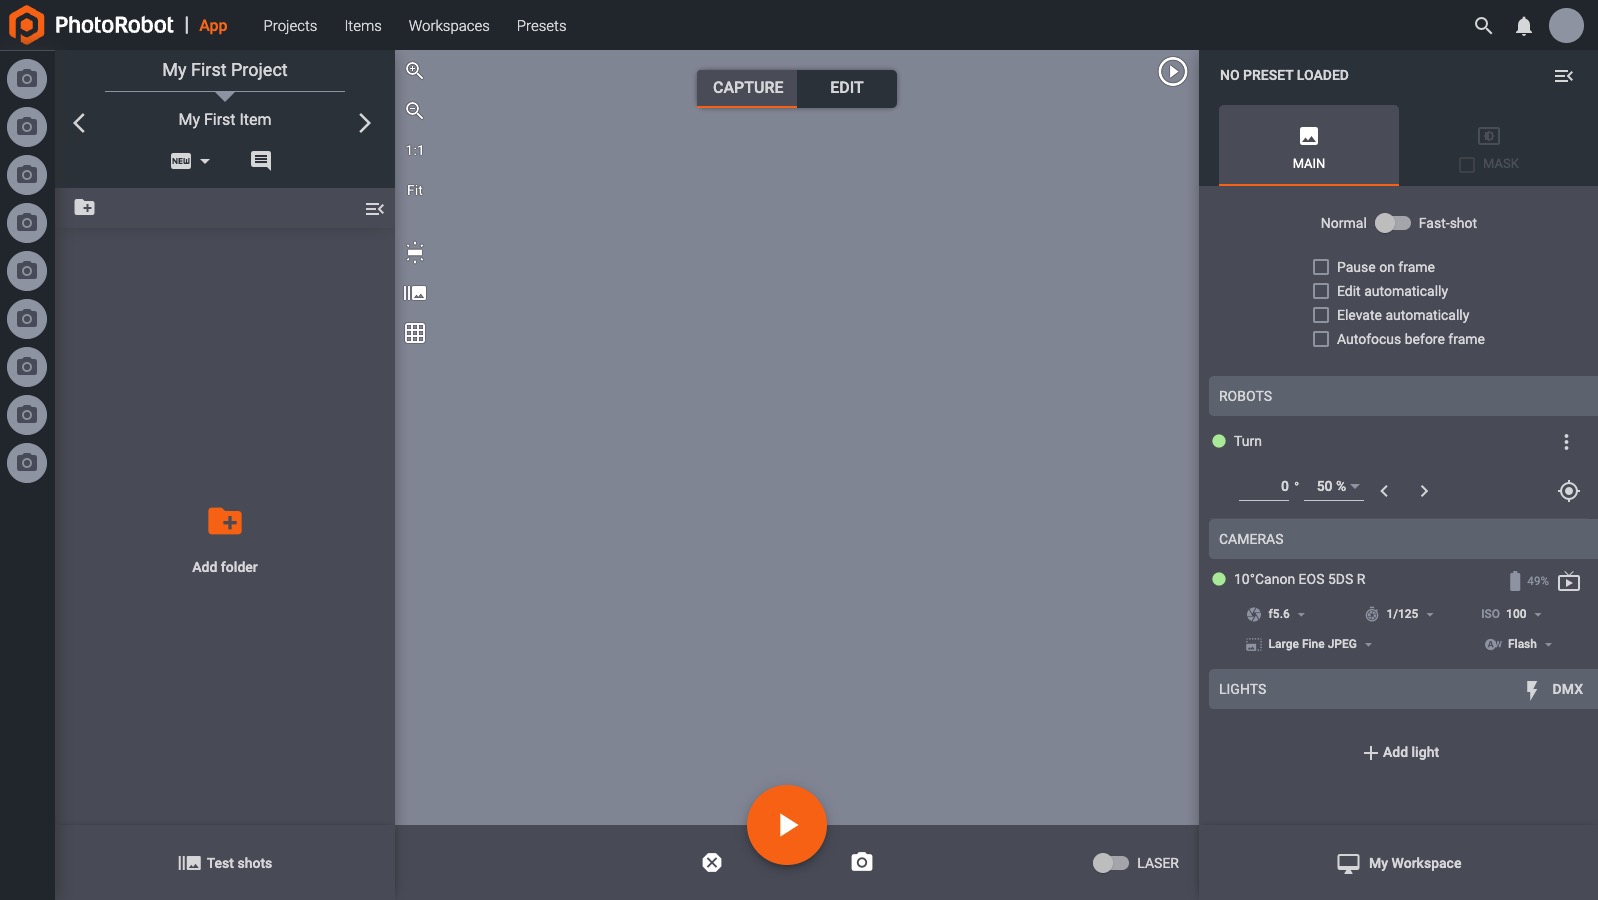
For each light, you can configure two channels: