
Previous
Improtech PhotoRobot - Industry 4.0 Readiness


PhotoRobot Controls App (further referred to as “CAPP”) is designed to automate content production processes (images, videos, 360s, and 3D models). This guide consists of 4 sections, each representing the process:
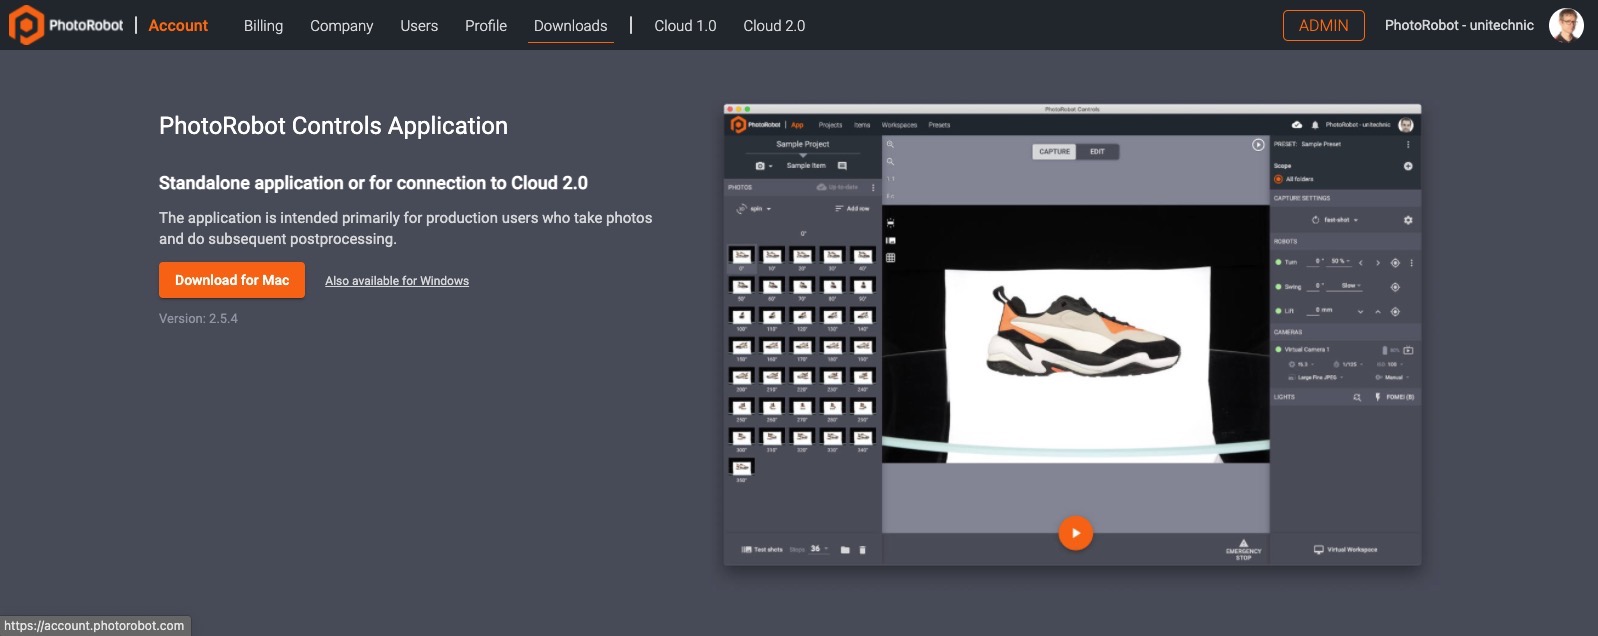
To install PhotoRobot Controls App on your computer, login to your PhotoRobot account and go to Downloads:
Important: To make sure CAPP communicates with your camera properly, please close all other programs that connect to the camera. Also be sure to use a compatible camera. This includes recent Canon DSLRs and mirrorless camera models.
For CAPP to communicate with lighting, be sure to use compatible lights. These include two types of lights: strobe lights from FOMEI and Broncolor, and any type of LED lights with DMX support.
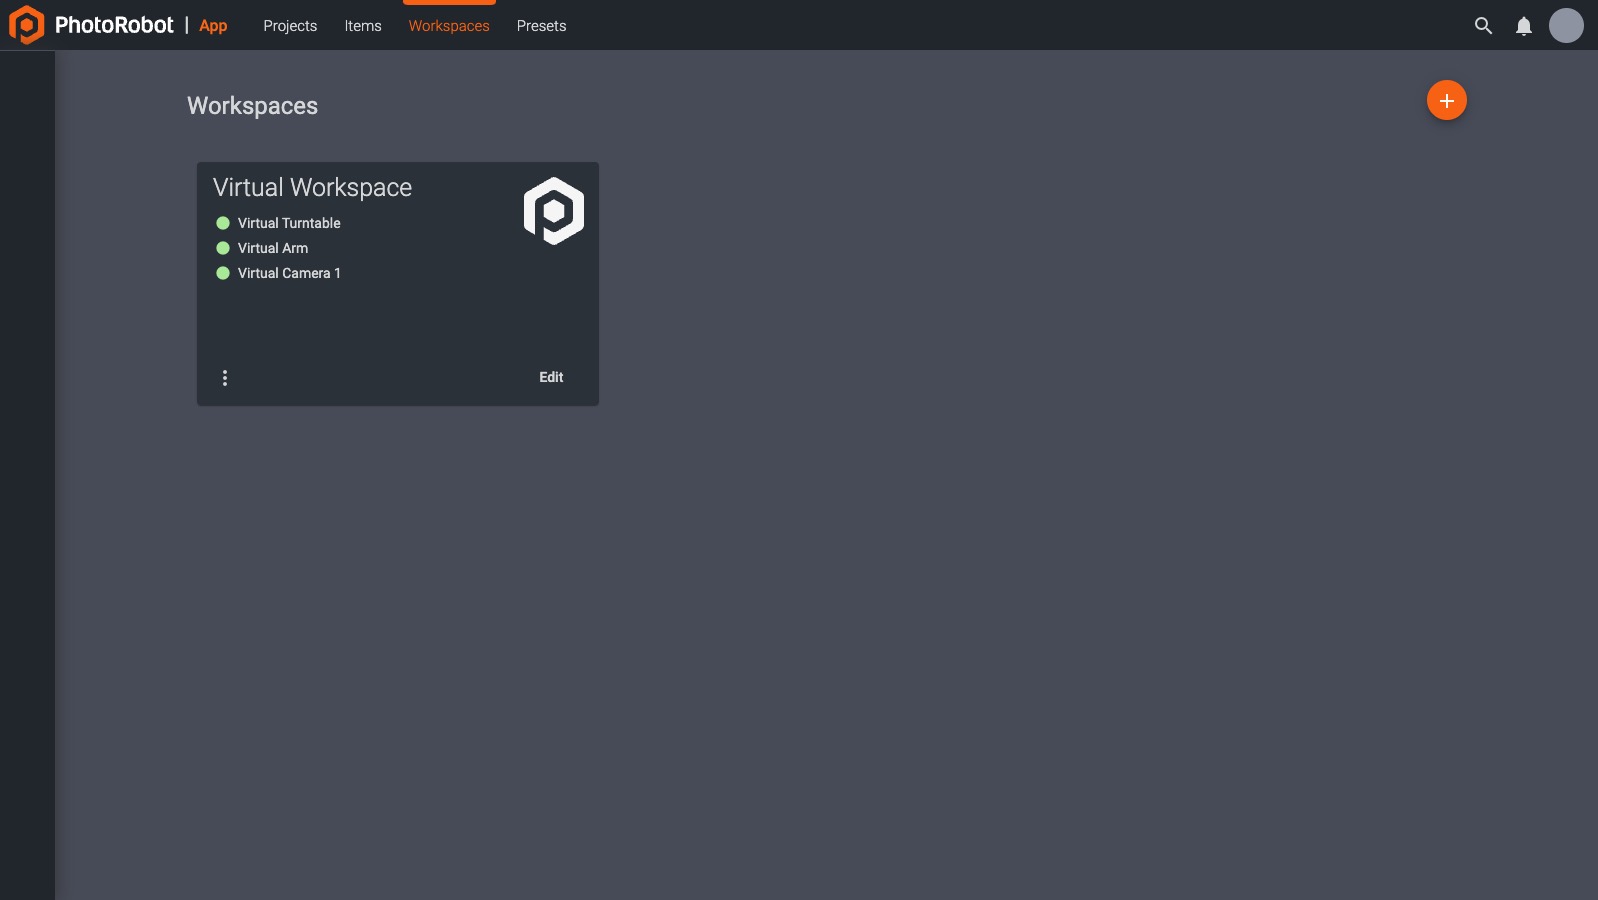
After opening CAPP, typically the first thing a user does is create a workspace. A workspace is a list of hardware that is being used for a particular photoshoot. It can include various PhotoRobot modules, cameras, lights, and other accessories.
For demo purposes, users can work with a predefined, Sample Workspace, which is configured to use virtual hardware. In this way, users can still experiment with various features of CAPP by selecting virtual robots and cameras.
To start using actual (as opposed to virtual) hardware, make sure the hardware is connected to the same computer network (or a sub-network) as the computer you are using to control your PhotoRobot. Your camera must be connected to the computer via USB. Wireless connections are currently not supported.
When adding a piece of hardware to a workspace, you can check whether it is online (and recognized by CAPP). To do this, look at the dot to the left of the name of the given piece of equipment. If it is recognized, the dot turns green, as seen in the following image.

A gray color signalizes that the hardware was not recognized or is not turned on. For possible causes of this, please refer to the troubleshooting section of this guide.
In CAPP, images are organized into projects, items, and folders.
To start shooting, you must first add a new project (unless you already have one that you would like to use), as well as at least one item.
( ! ) - If experiencing issues, find additional support for connecting cameras, robots, lights, and editing in the PhotoRobot Troubleshooting Manual.
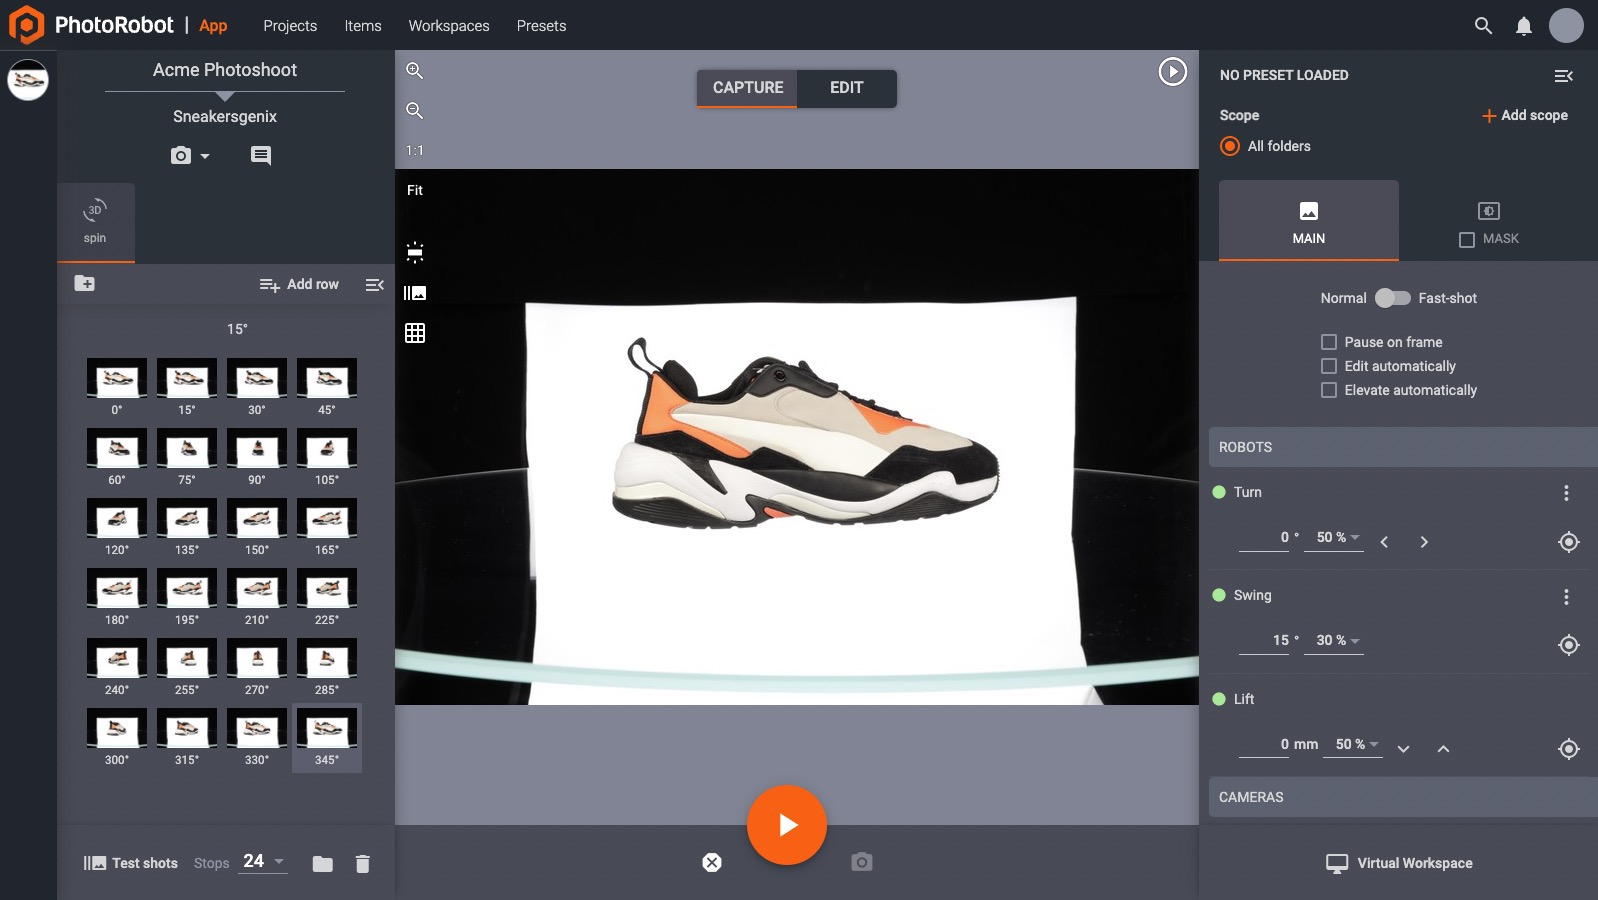
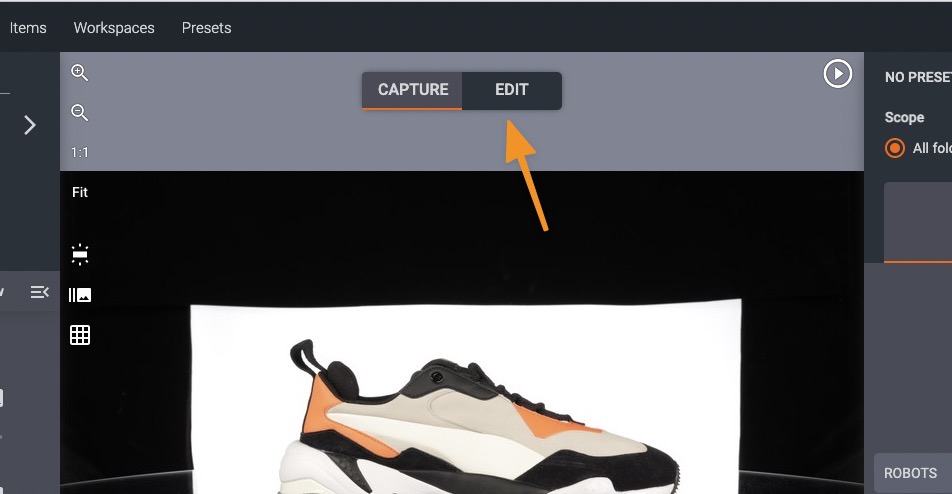
After clicking on an item, you will be taken to a capture/edit interface. The controls available to you change based on whether the capture mode is active, or the edit mode. The capture mode is used to control the photography sequence, while the edit mode controls all post-processing performed within CAPP. The active mode will be highlighted at the top of the screen:
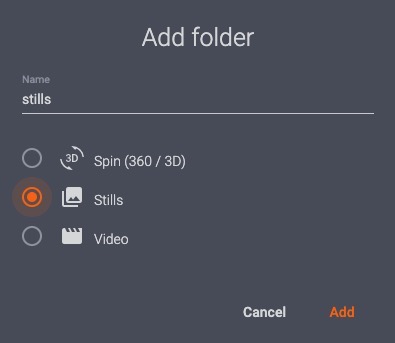
Before any photoshoot, you must create at least one folder. The main types of folders are spin (used for 360° presentations), stills (for still images), and video (for videos).
When adding a spin folder, CAPP will automatically add stops (also called “frames”) based on how many images per spin you select. The default number is 36, and this can be changed in the bottom left corner. With a higher number of stops, the rotation will be smoother, but it will also take up more storage space.

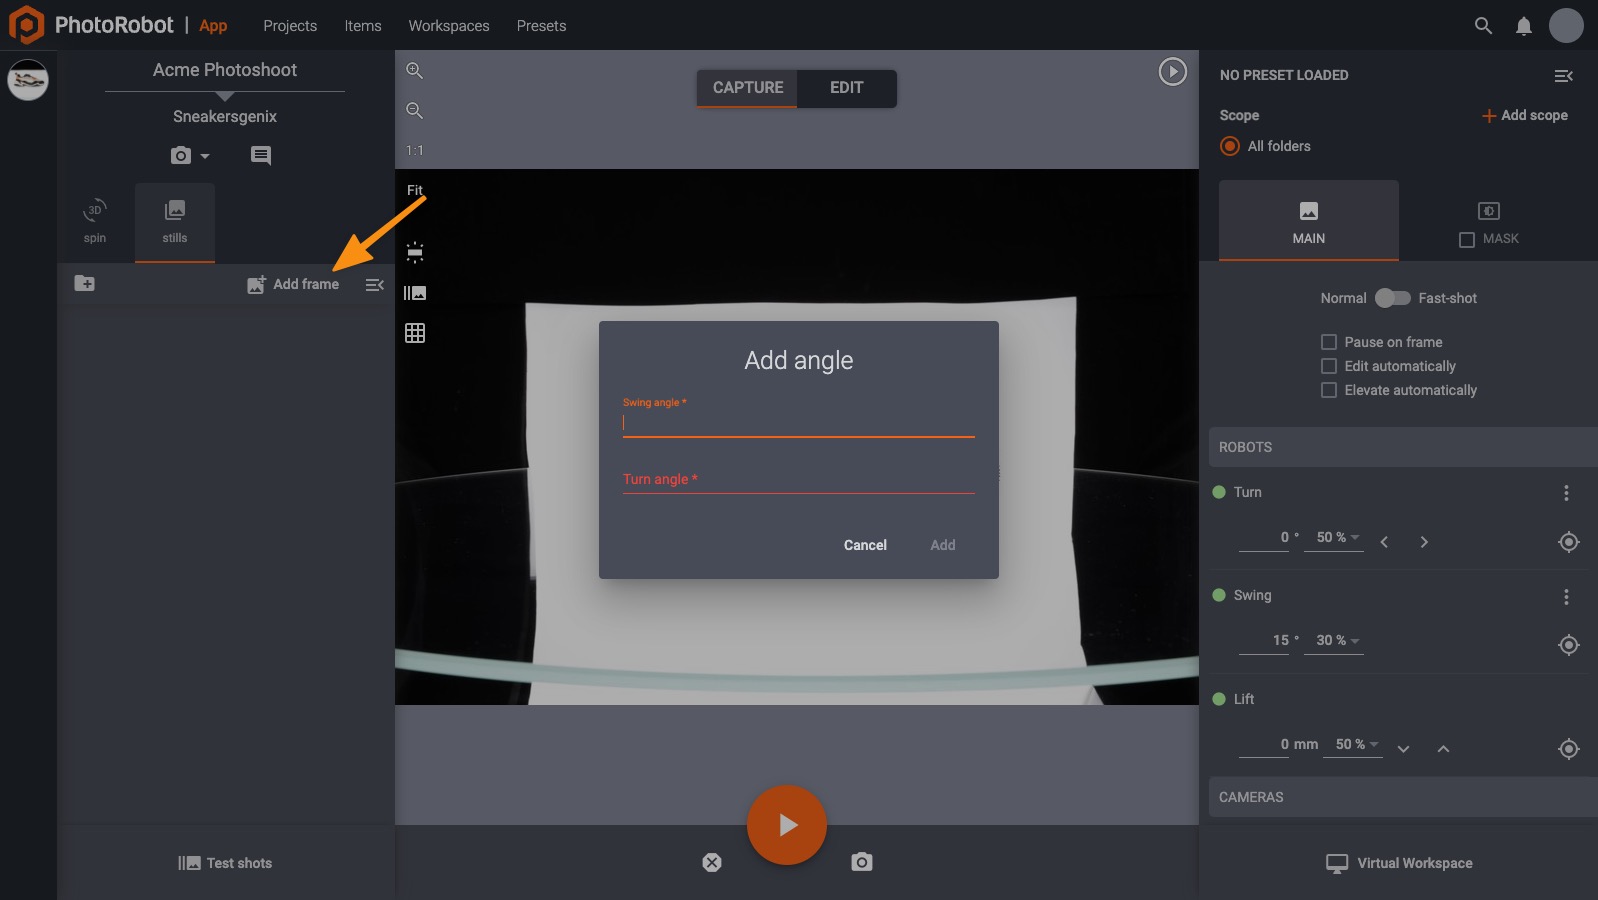
If you select a stills folder, you must add your stops manually. This will include a turn angle (the rotational angle) and a swing angle (the vertical position of the camera along a circular trajectory). The swing angle is important if you are using our Robotic Arm or another module that can change the horizontal position of the camera.
When using lights compatible with CAPP, you are able to select lights in the bottom right corner of the edit mode window.

The central part of the capture mode interface includes the preview window, which either displays the currently selected image (if you have already taken some) or the live view streamed from the camera.
Live View, which is useful if you want to check composure and focus, can be toggled in the camera control area in the central part of the control bar on the right-hand side of the screen.

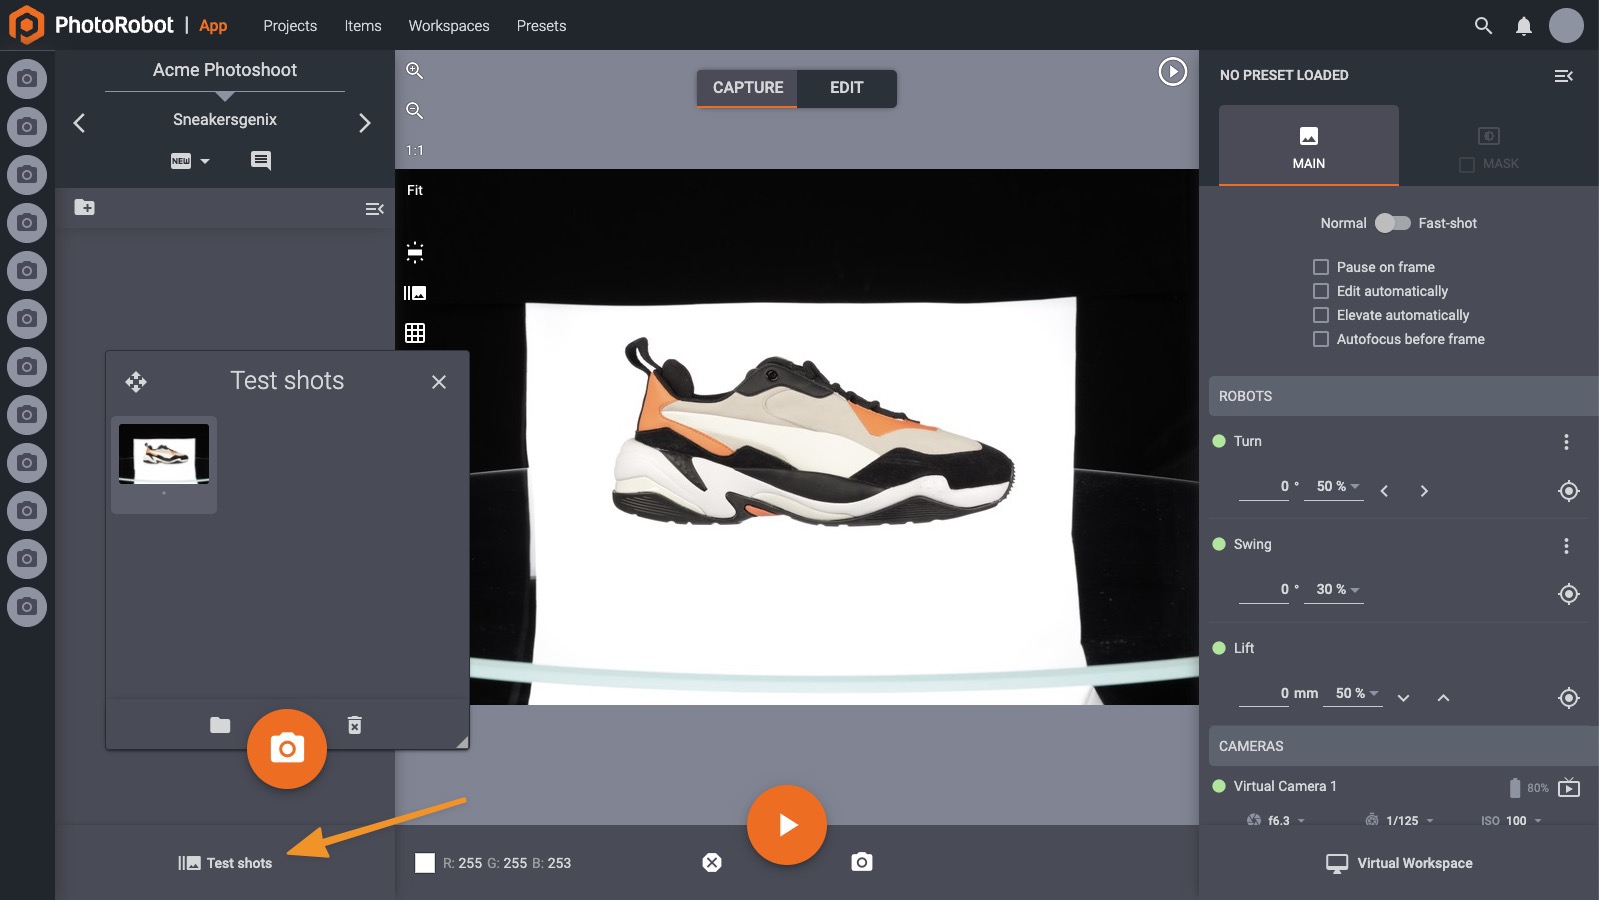
Before taking final images, it is a good idea to take one or more test shots. The easiest way to do this is by pressing the T key on your computer keyboard. This will help you check whether you should change the settings of your lights, camera, etc. Test images are stored in the “test shot” folder, which you can access in the bottom left part of the screen.
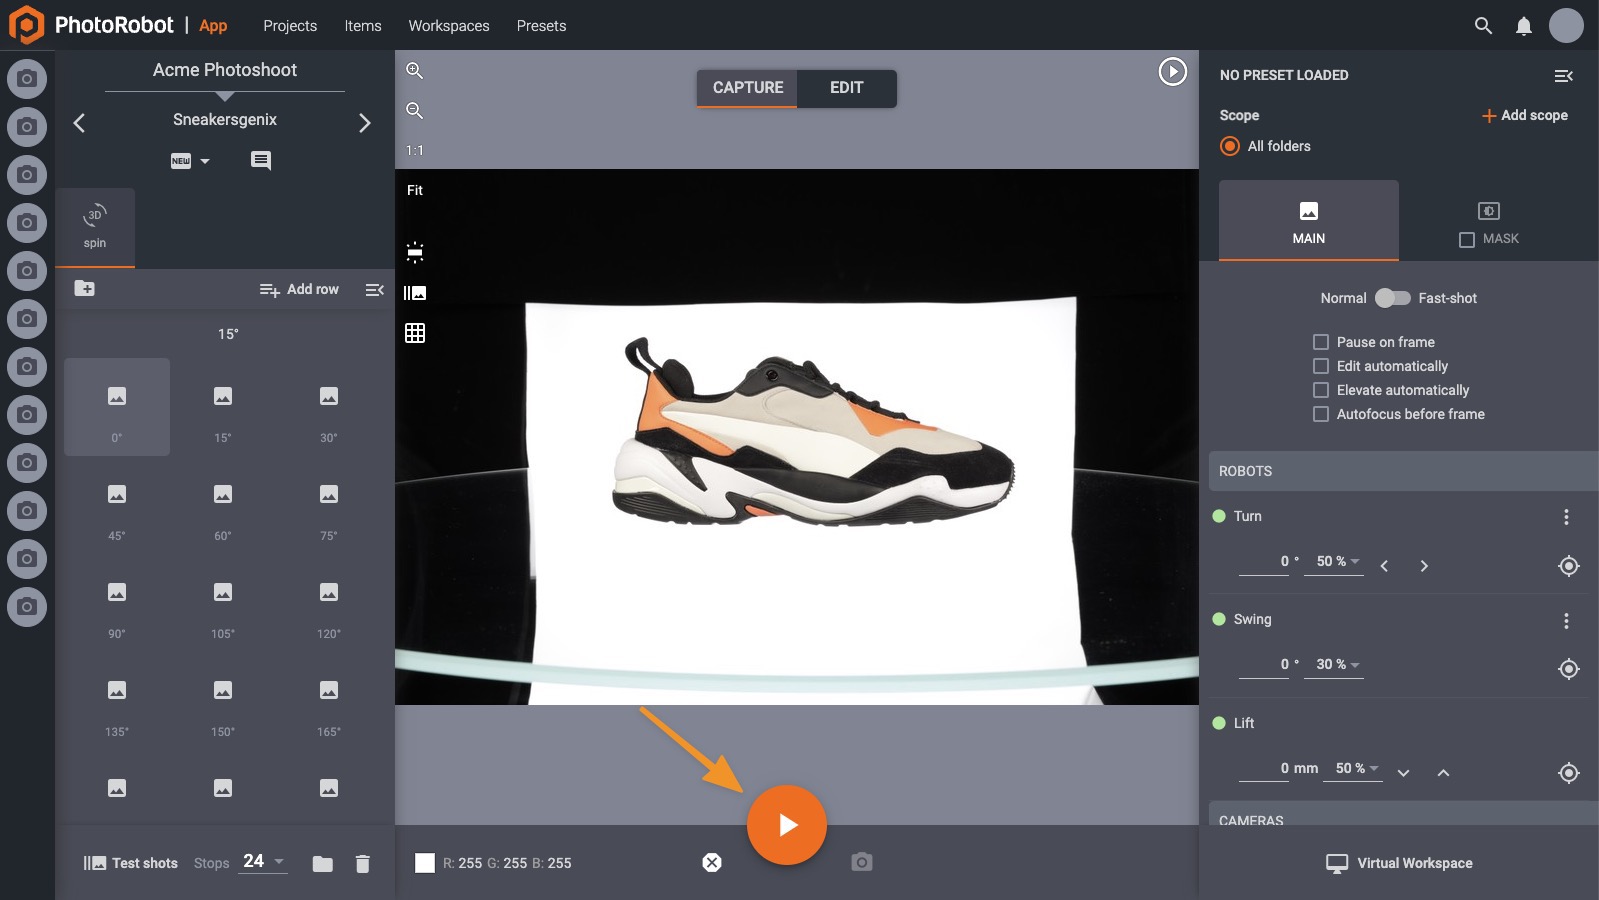
When satisfied with the settings, which were verified by taking a test shot, it is time to run the photography sequence. This can be triggered by pressing the space bar on your keyboard or by clicking the “start” button shown in the picture below.
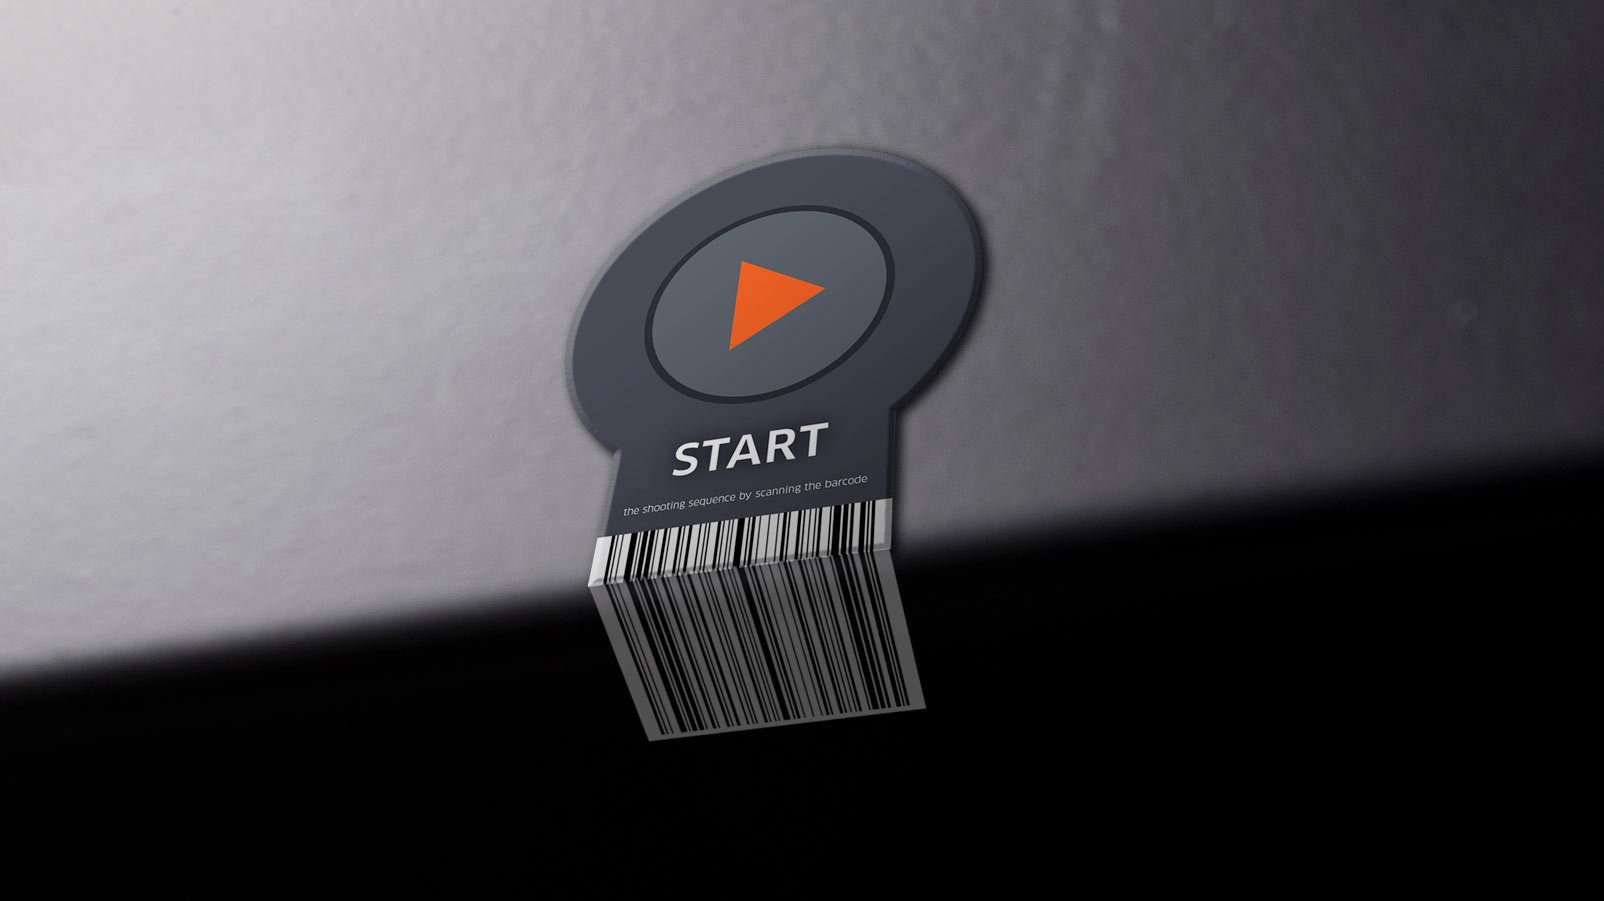
If you have a barcode scanner, you can also trigger the sequence by scanning a special “start” bar code, which you can download here.
You will know that the sequence has finished successfully if all thumbnails on the left-hand side have been filled with images. It is a good practice to pay attention to any potential misfires of the strobe lights.
If any of the thumbnails are darker compared to the others, lower the rotation speed or, if necessary, check the condition of your lights. You can then mark these images and reshoot them without having to run the entire sequence again.
Once the capture sequence is complete, you can switch to edit mode, which is where you will perform post-processing.
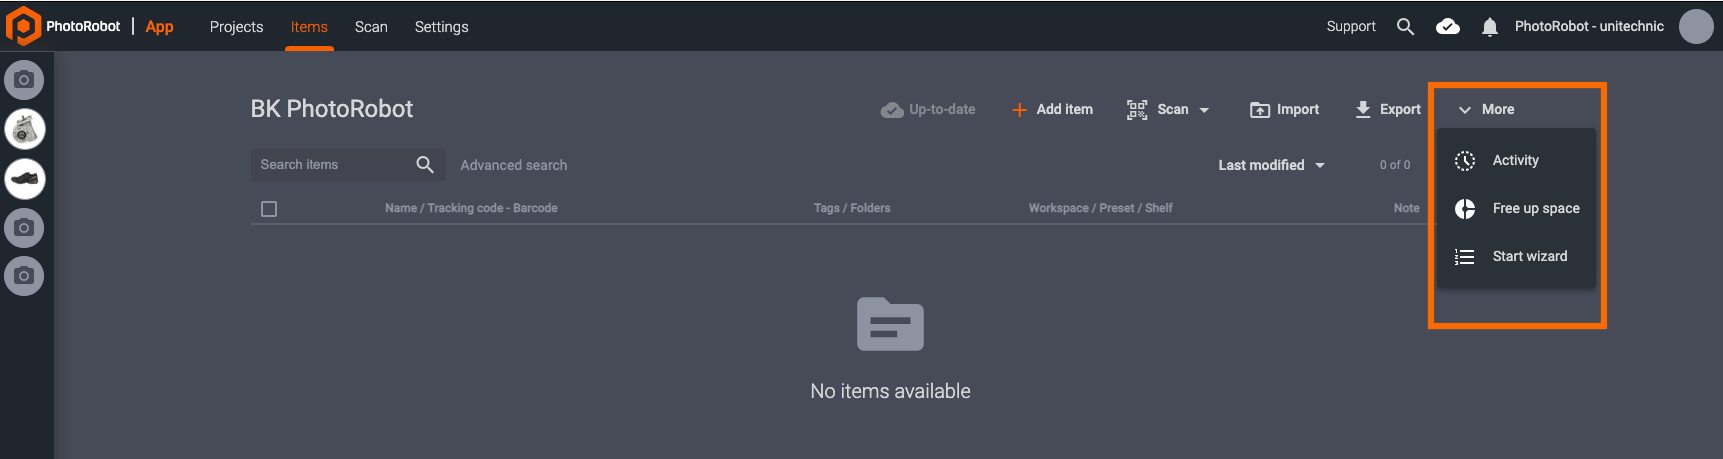
Wizards mode in CAPP functions as an alternative to manual hardware, camera, and sequence configuration. In use, this mode enables an administrator or photographer to create different Wizards to simplify capture mode for production-line operators.
On creation, a Wizard stores Presets and Workspace configurations, as well as predefined steps operators must follow. Operators cannot adjust any settings, and they must complete the instructions in each step before they can move onto the next process.
Note: Wizard steps are defined in a JavaScript-like language format, and scripted by PhotoRobot consultants for custom functionality. Users can also script basic functions for initial experiments or simple setups. For technical documentation on configuring Wizard Steps, see the Wizard Mode Configuration Support Manual.
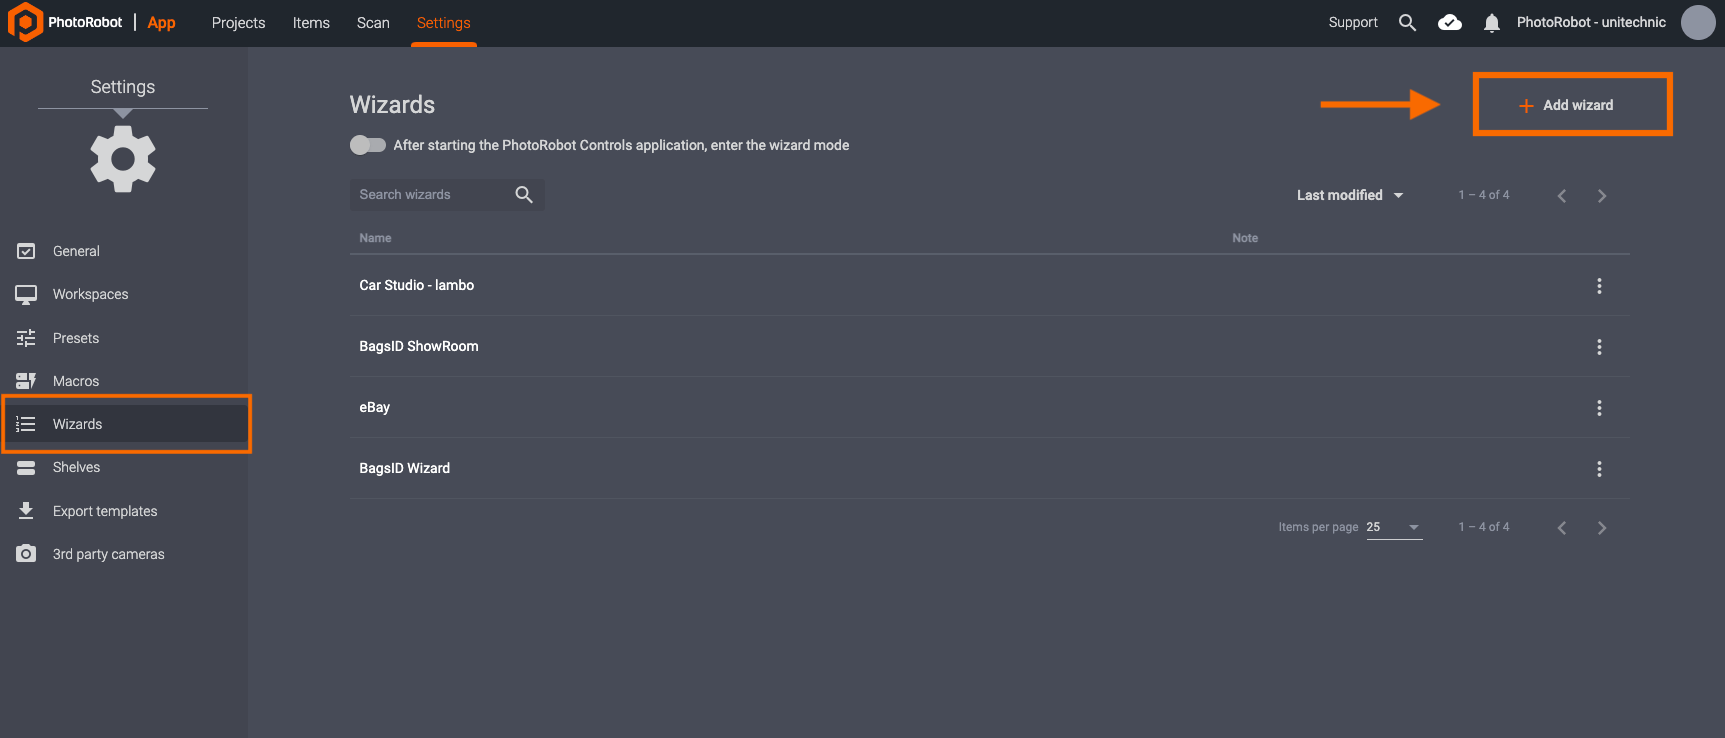
To access Wizards mode, open the Settings menu in the local app. Here, users can load Wizards via the left-hand side menu, or create a new wizard using Add Wizard in the top-right part of the interface:
Options to create, edit, or customize a Wizard include Wizard name, Item name, Notes, Presets, Workspace, and Wizard steps:
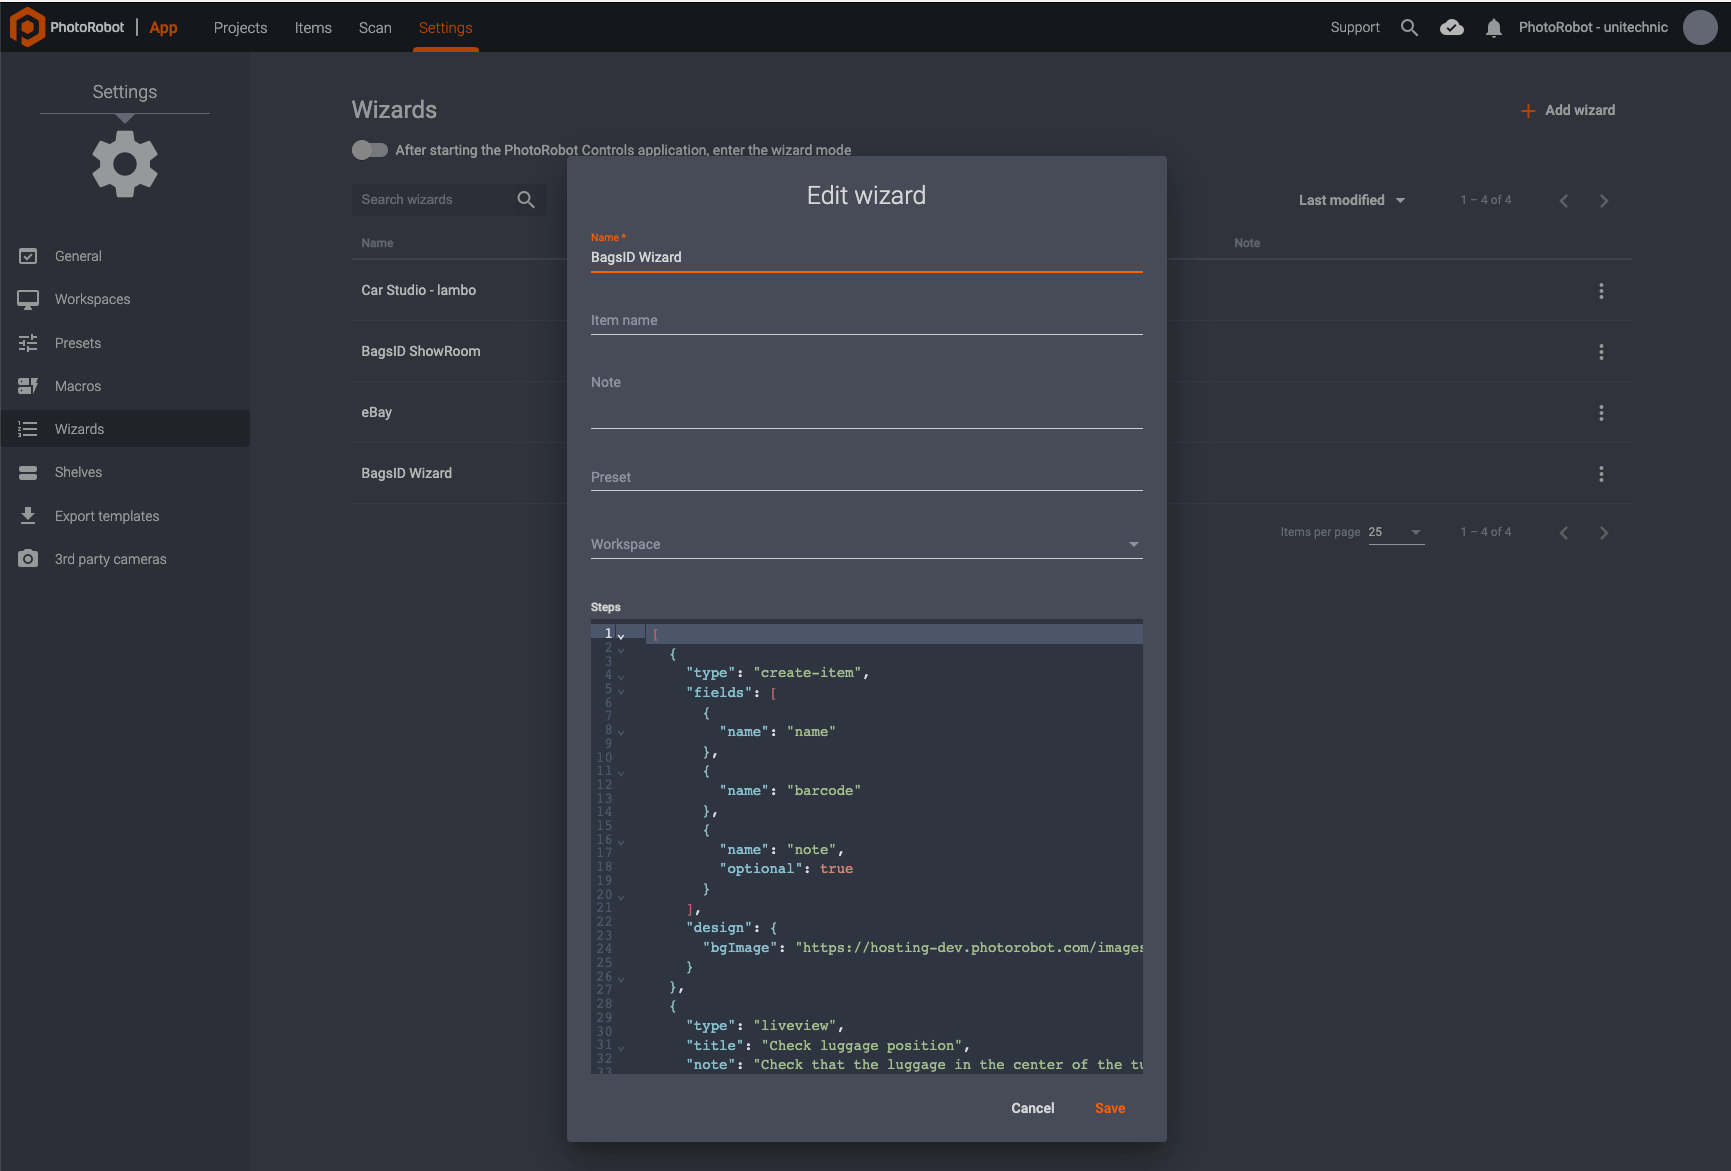
Note: In order to launch a Wizard, it must contain valid Presets, all Workspace configurations, and most importantly the number and names of directory folders. Each of these will then have to match the steps defined in the Wizard for its proper operation.
For reference, the following is a generic script for initial experimentation and setup by a customer. Customers can use this code in the Steps section to test its functionality and run a basic script:
[
{
"type": "select-item",
"fields": [
{
"name": "name"
},
{
"name": "note",
"optional": true
}
],
"design": {
"bgImage": "https://hosting.photorobot.com/images/-ML2QkR2lrhwn5SVMaEu/-Nehz_ciyDihw90EgNuy/FINAL/tqZxrqbKZ4exH6y2LFPWUw?w=1200"
}
},
{
"type": "liveview",
"title": "Check the position",
"note": "Check that person is in view.",
"cameraAngle": 15
},
{
"type": "capture-folder",
"title": "Capture spin",
"dirName": "spin"
},
{
"type": "capture-folder",
"title": "Capture stills",
"dirName": "stills"
}
]
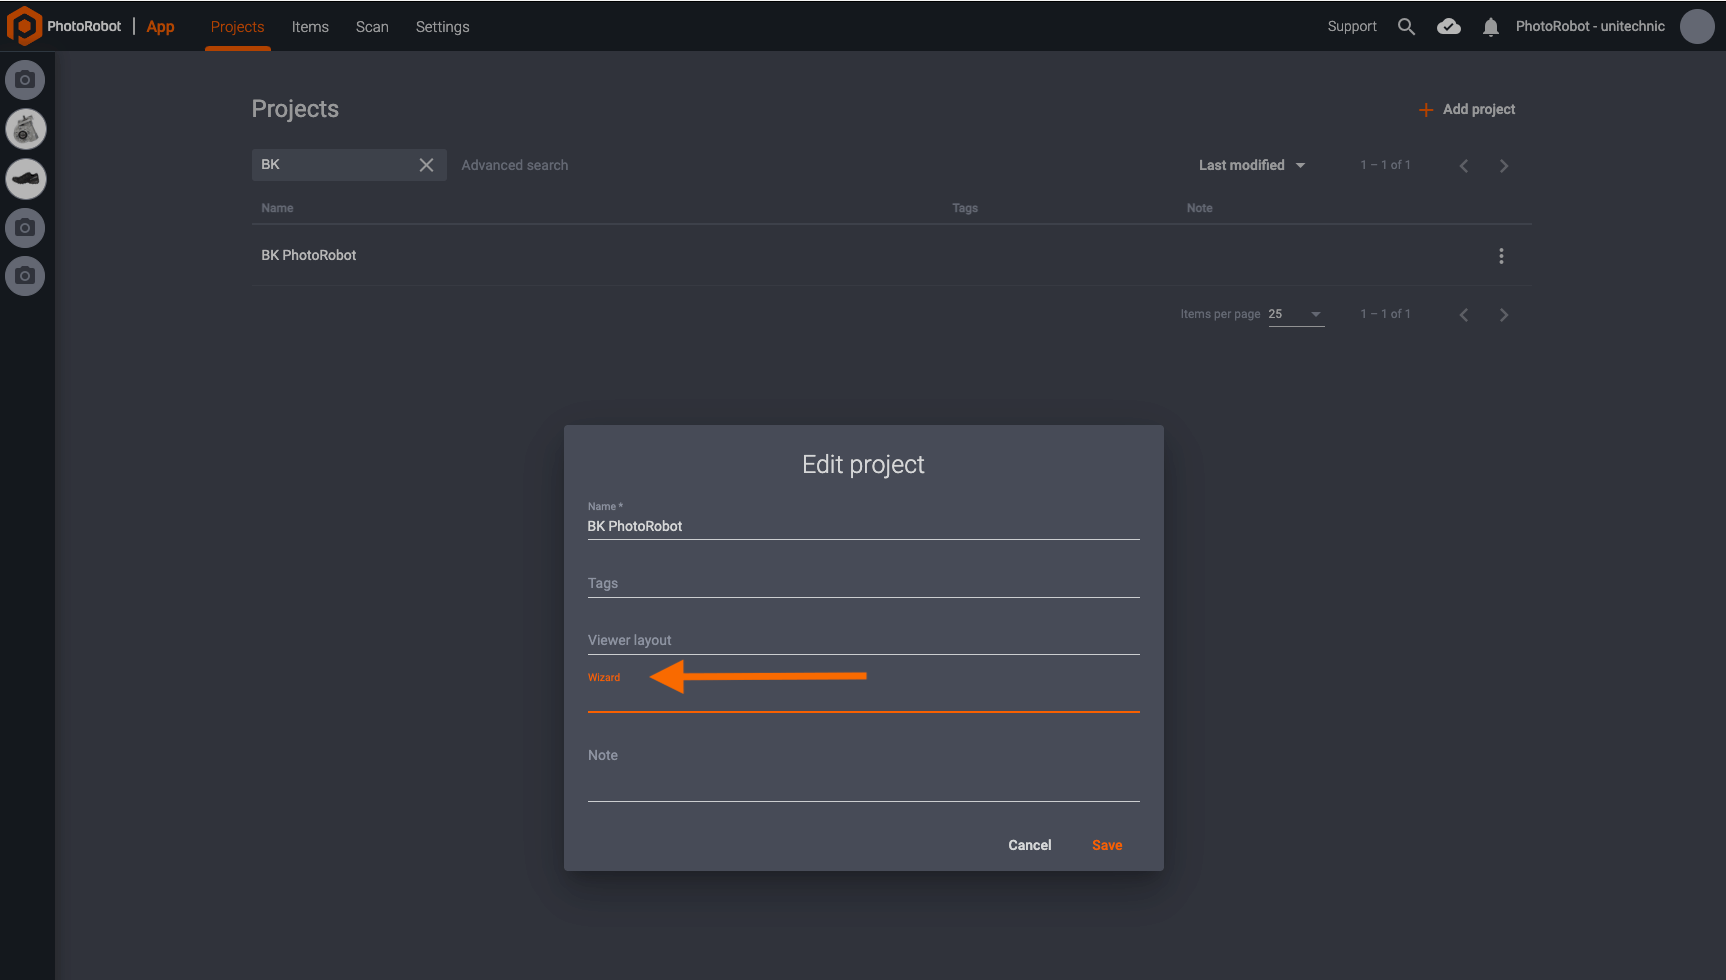
To start a Wizard, first assign it to a project and click Save:
After assigning the Wizard to a project, it is possible to launch the Wizard in 2 ways:
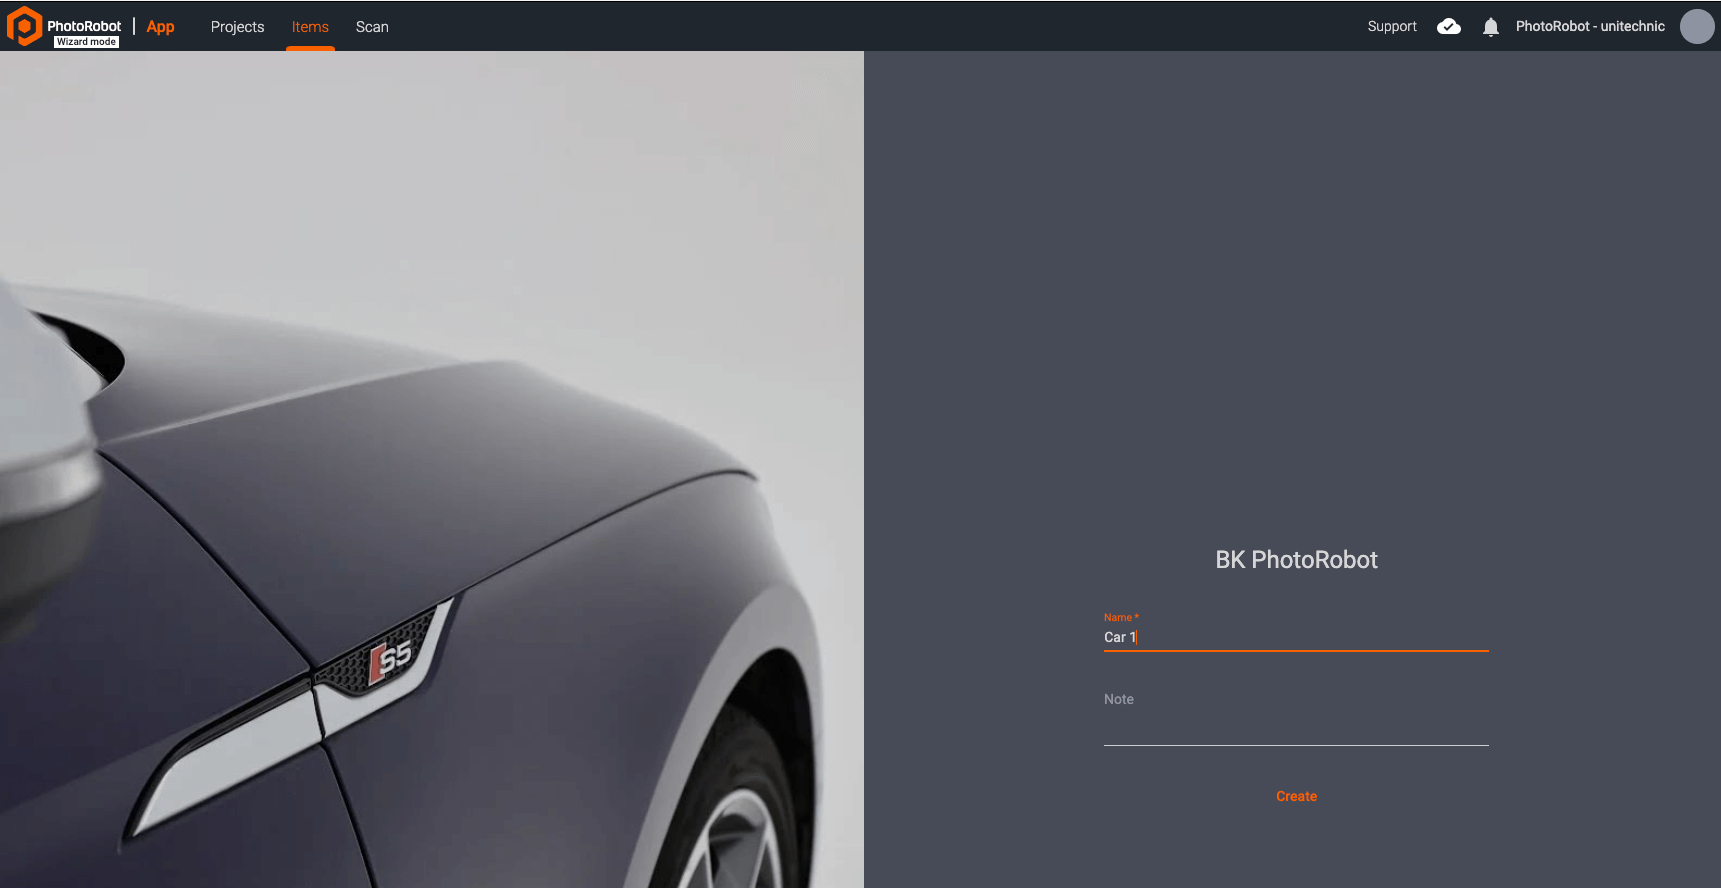
On successful launch, the first screen of Wizards mode displays the Project name at the top, and the Wizard name below. Click Create to launch the Wizard:
After the start screen, the Wizard displays the first stage in the predefined operation steps. From this point on, the operator must complete instructions for each stage of capture, and click Next at the bottom of the Wizard interface to move onto subsequent steps:
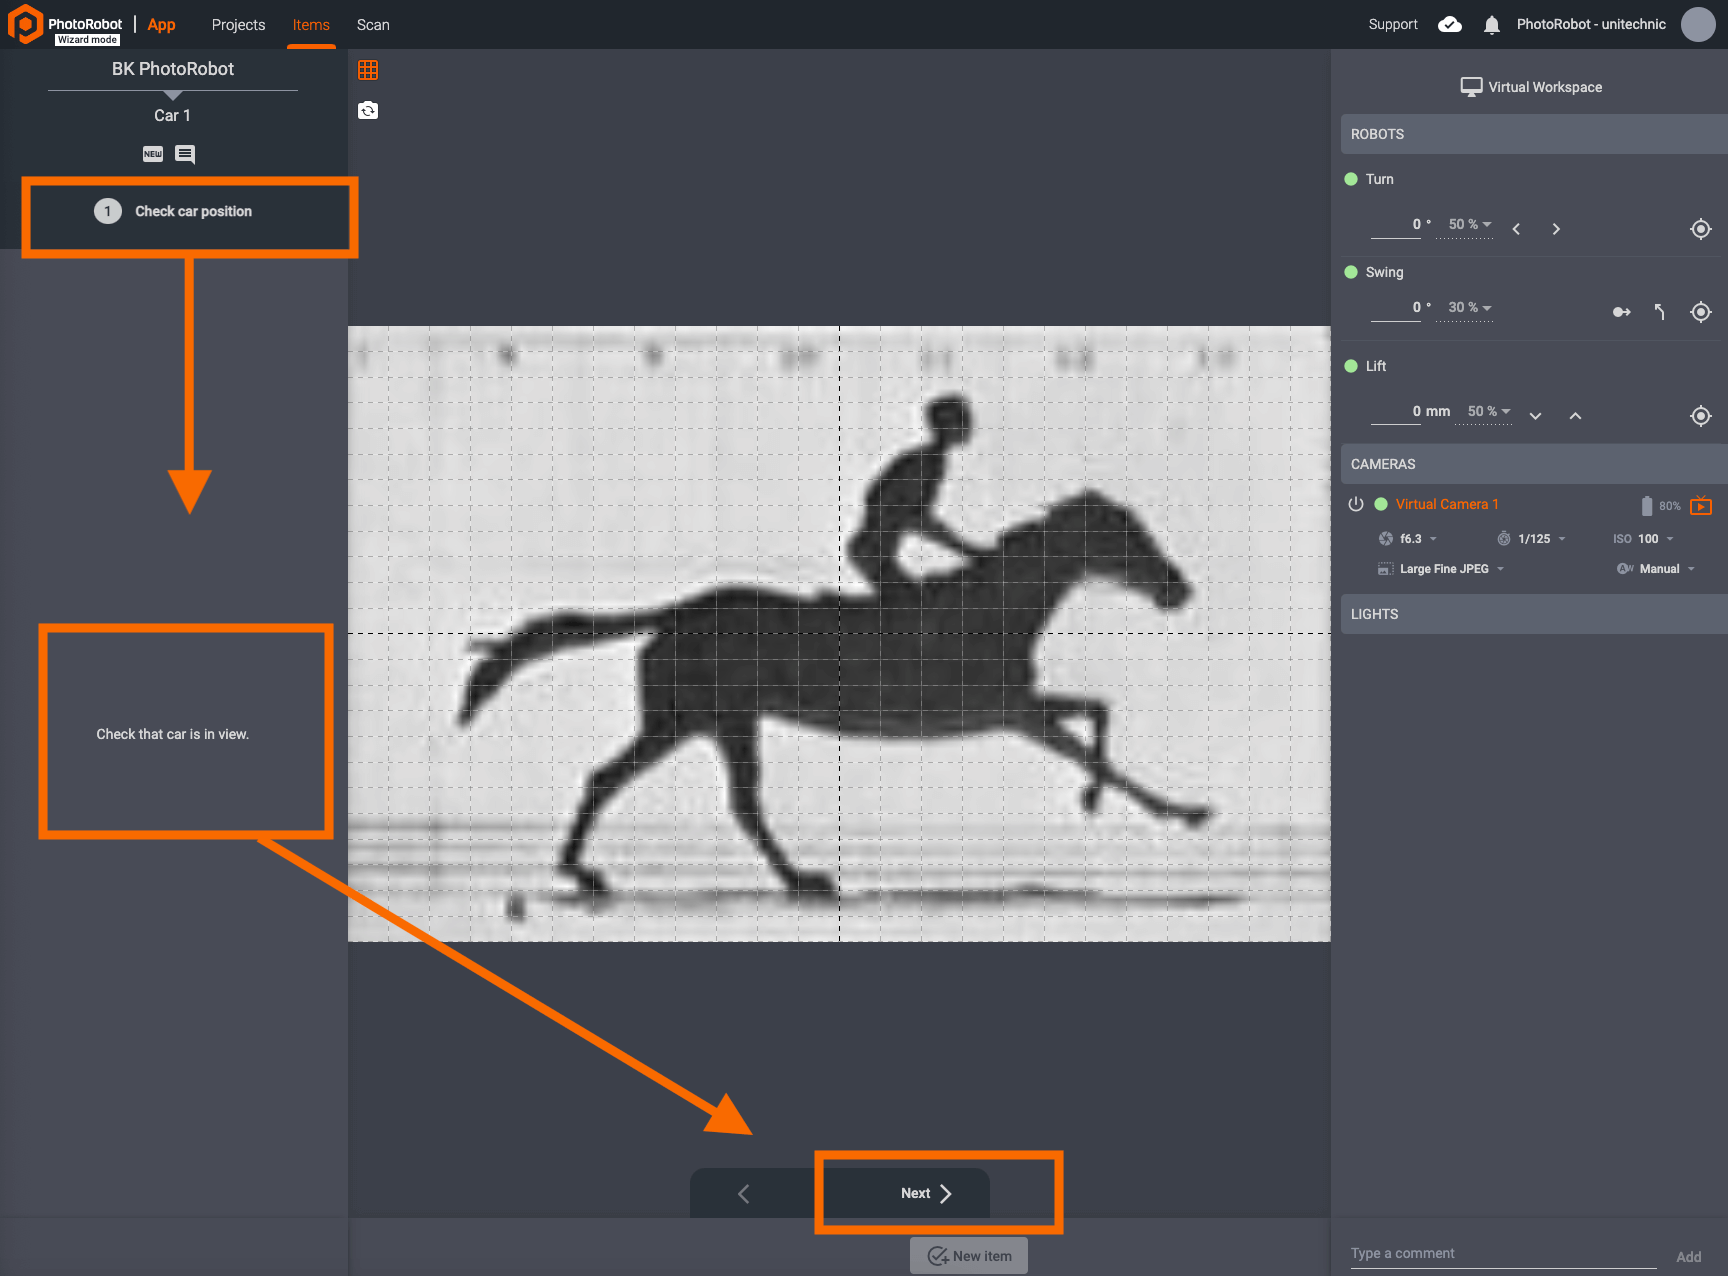
Usually, the first step will instruct the operator to configure the camera (or cameras) that will be in use. Here, the operator also checks that the product is positioned correctly and in view of the camera(s).
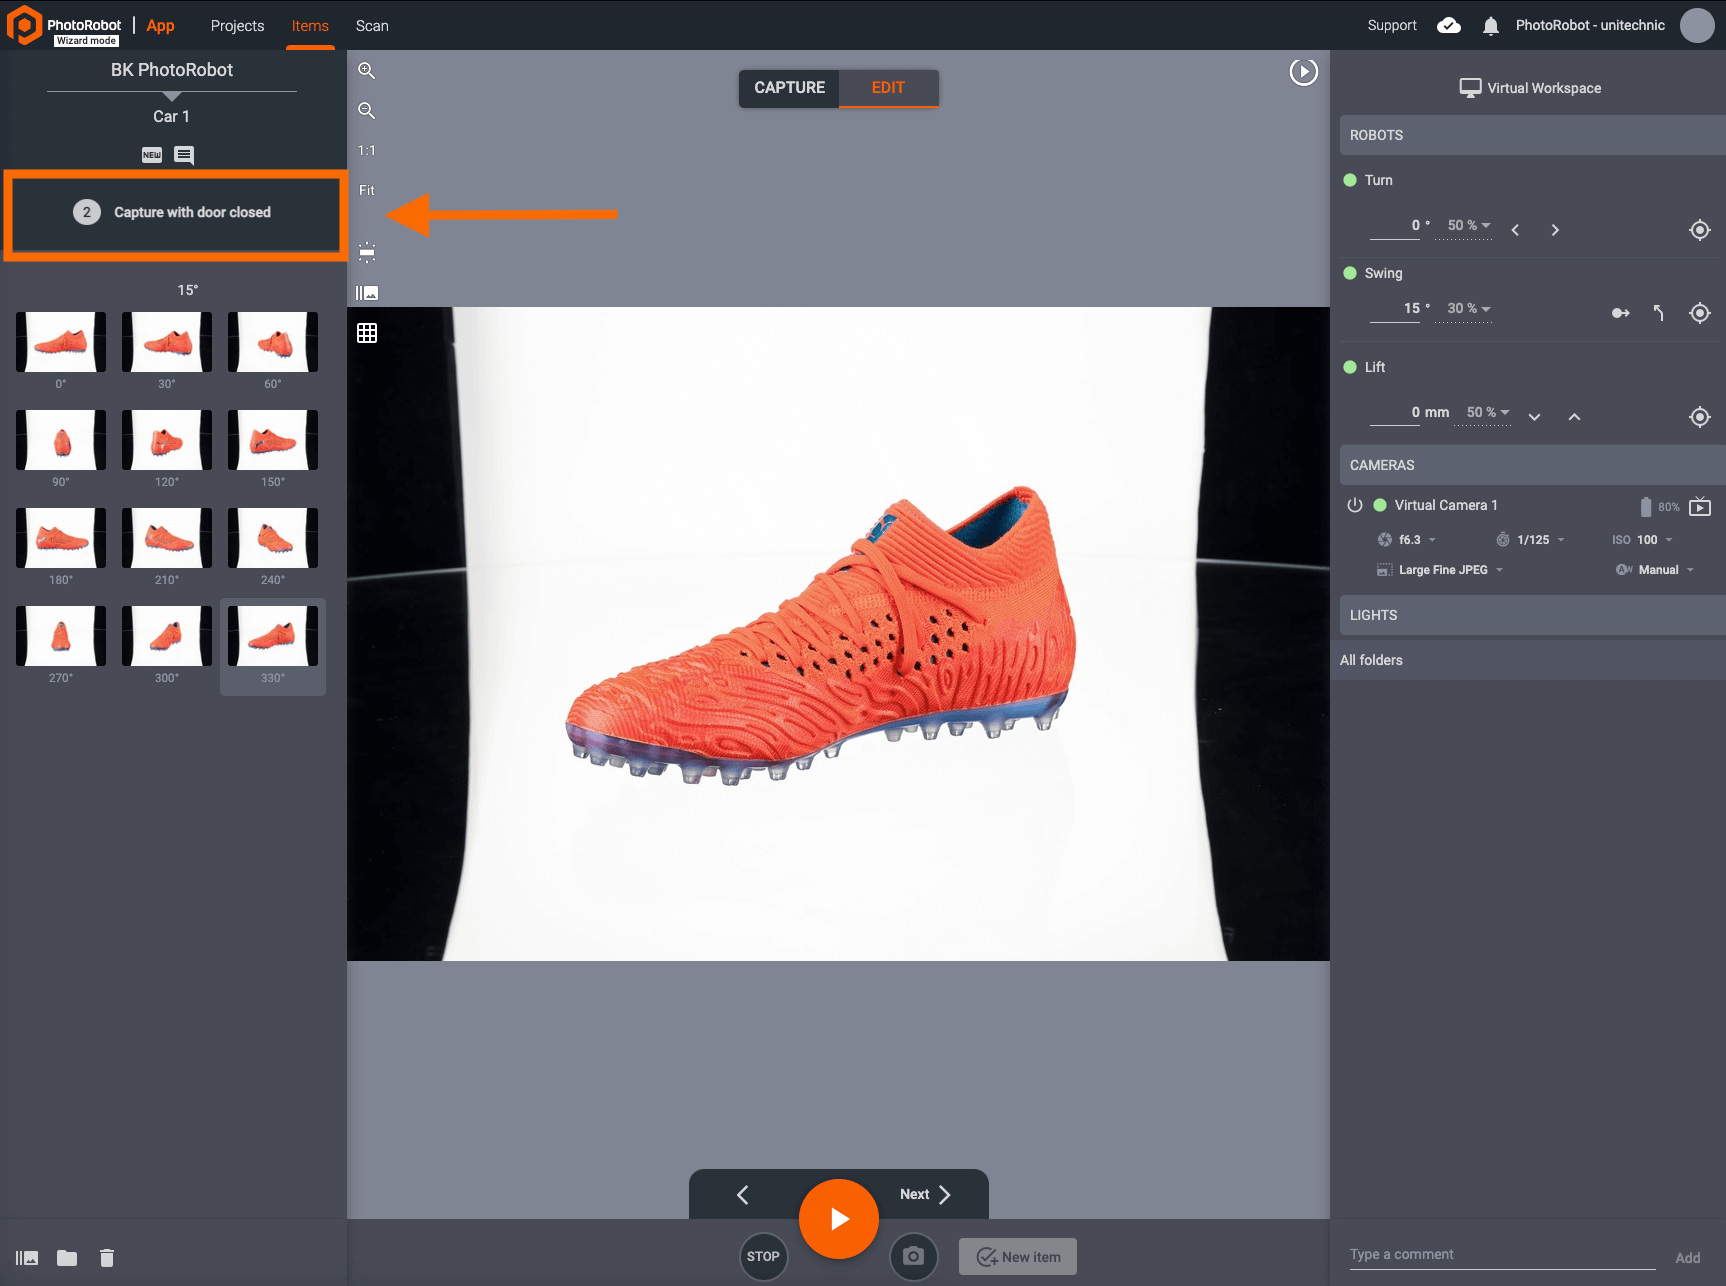
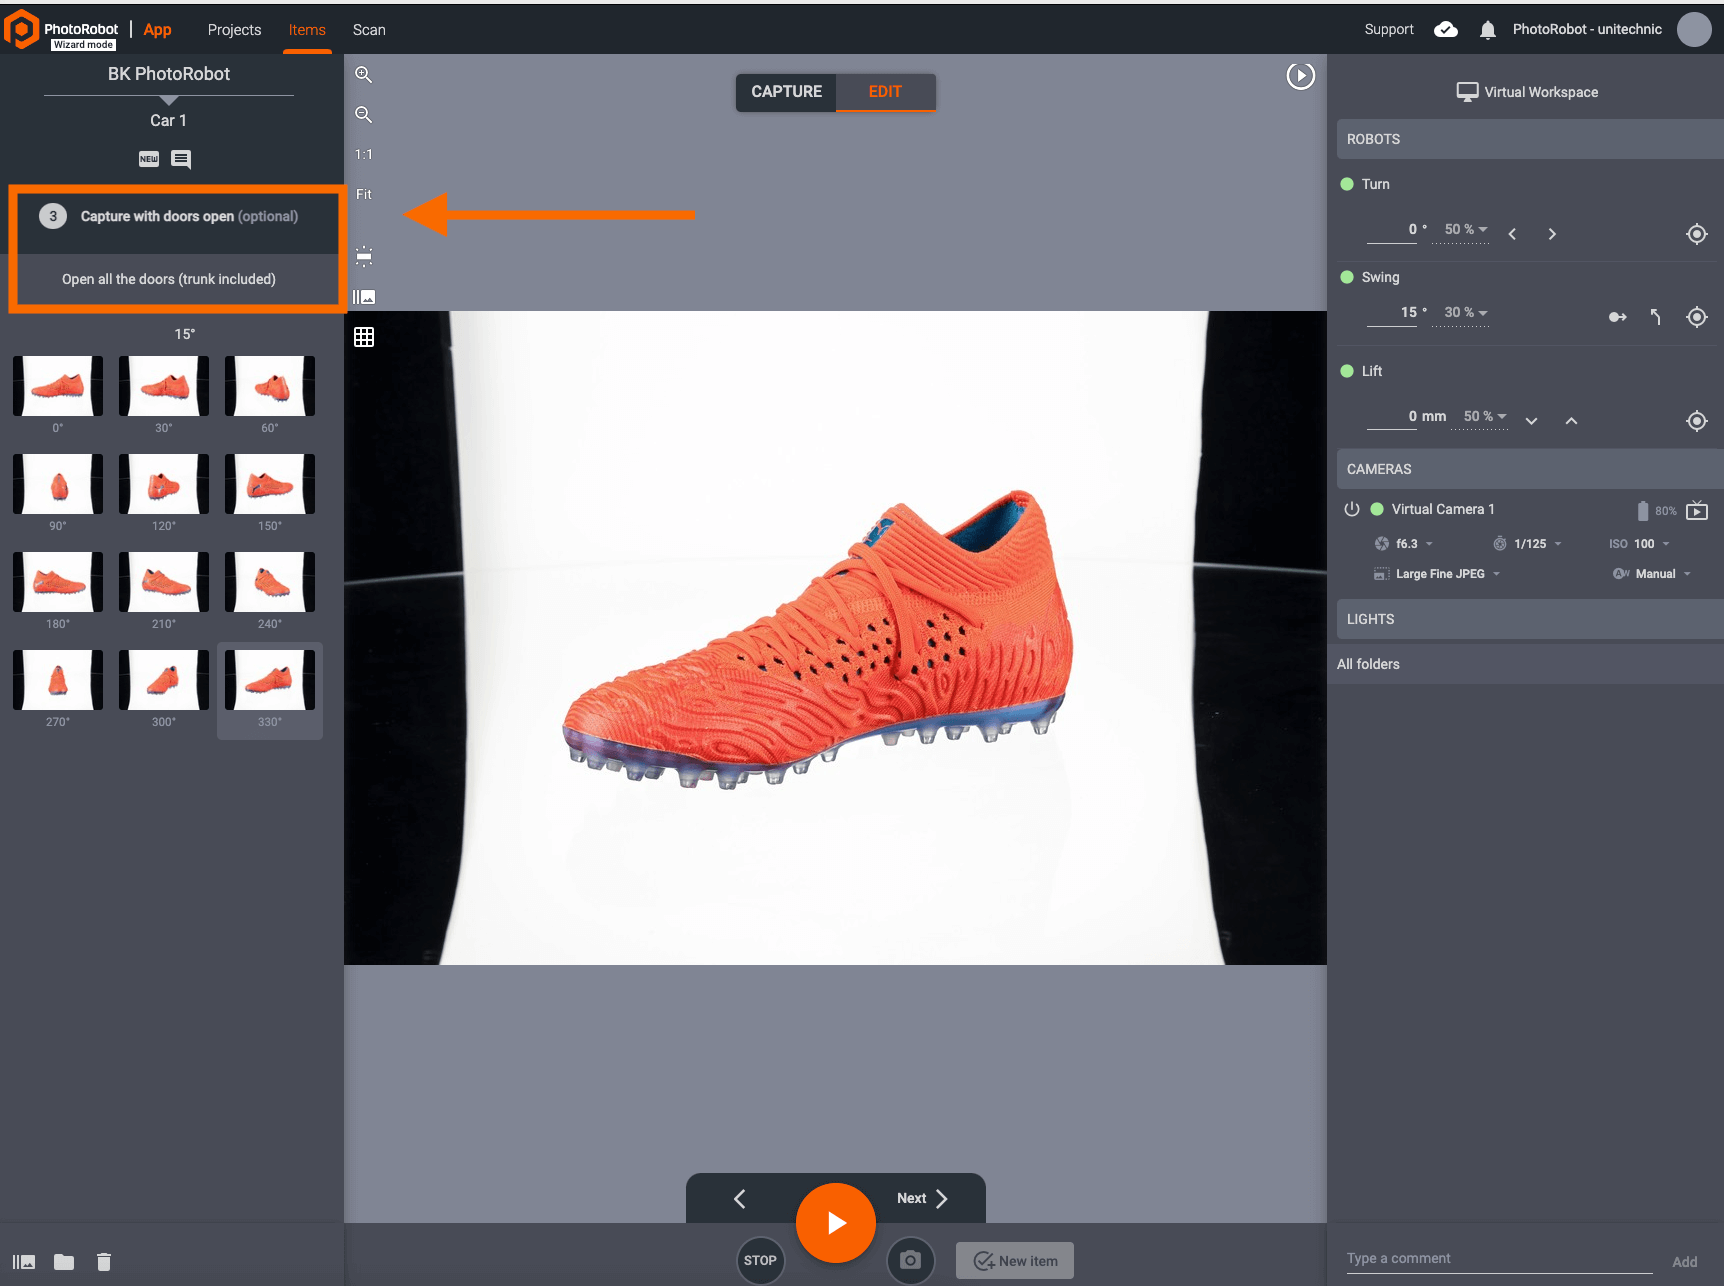
Subsequent steps then direct the operator according to Presets to capture given angles into a specific folder. These steps may also include instructions to photograph different product configurations, such as a car with its doors open, closed, or shot from the interior:
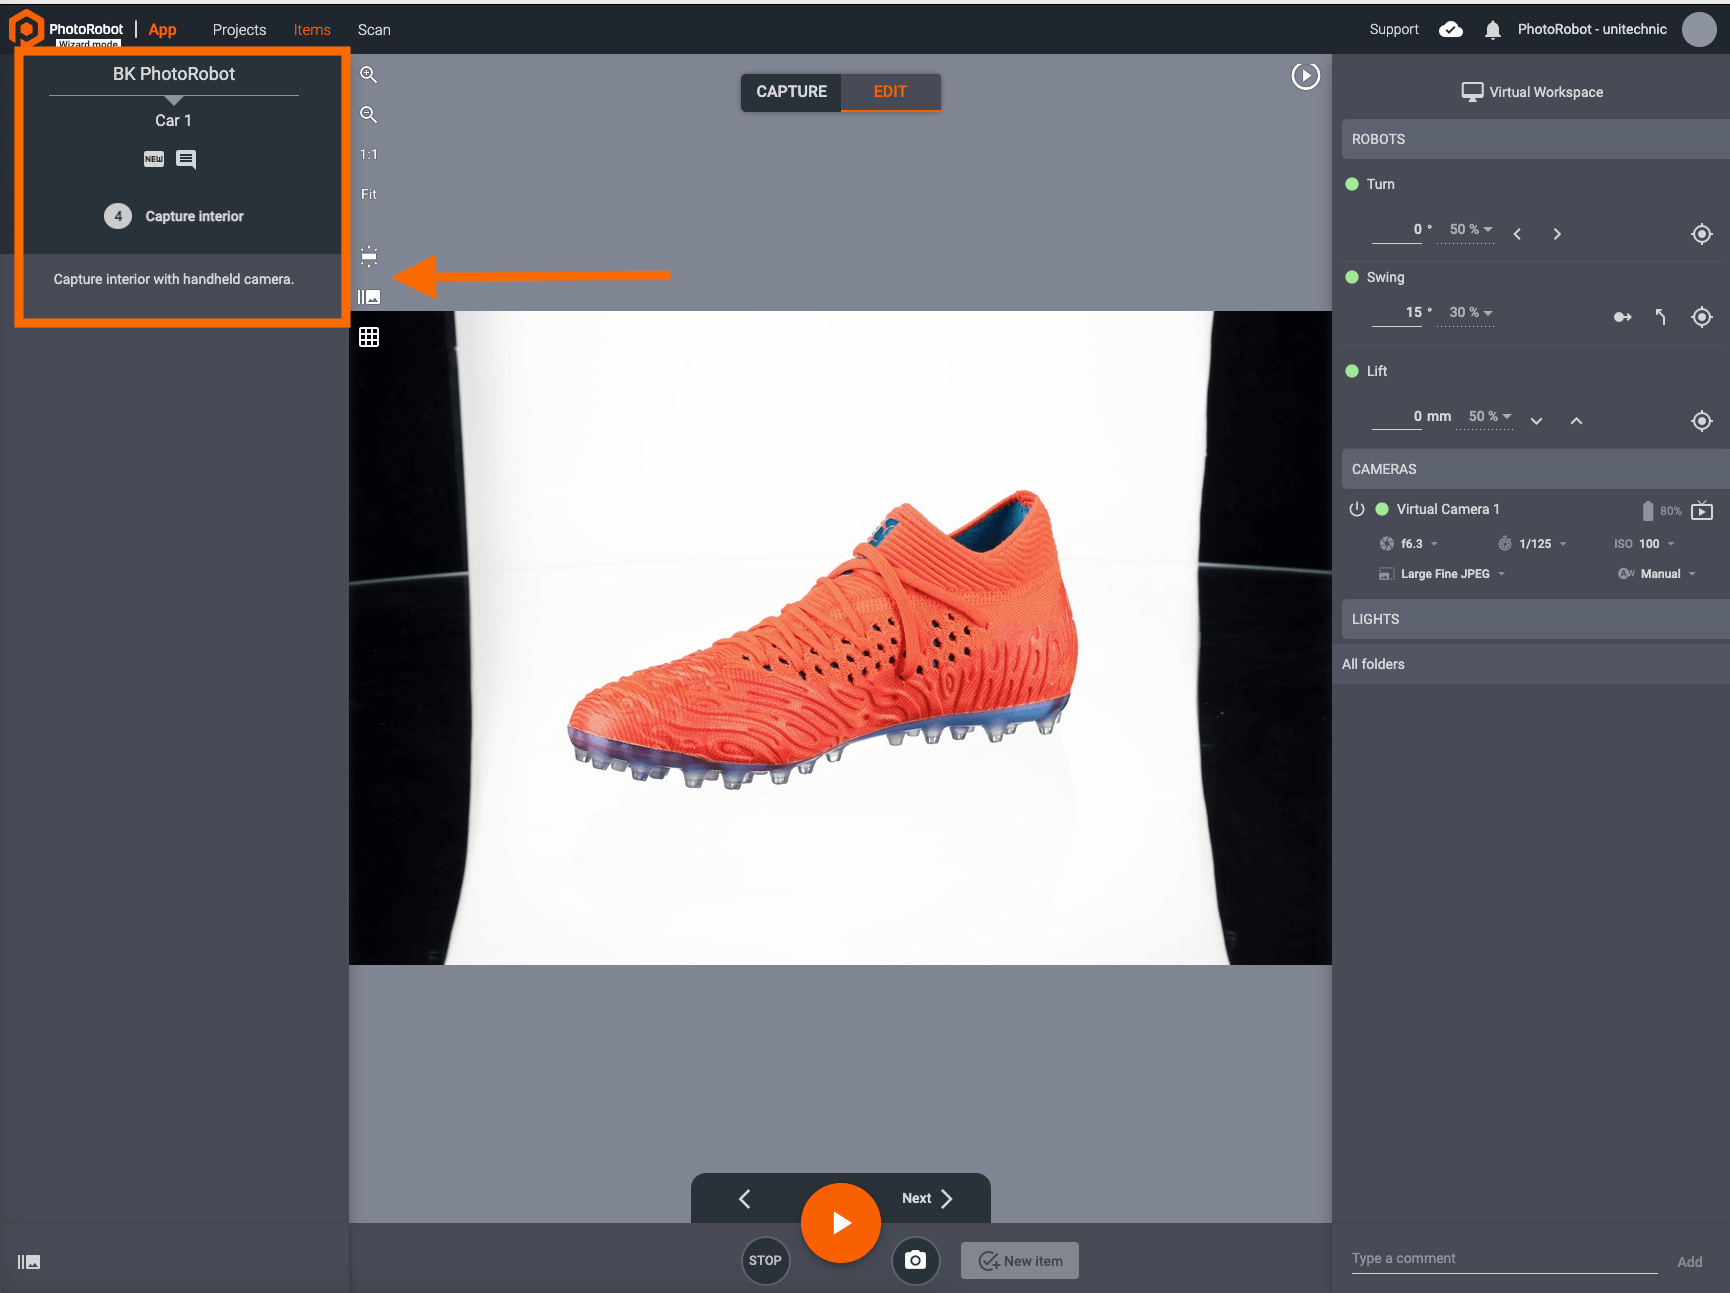
Further, Wizards can display notes for clearer explanation of individual stages. Notes are located on the left-hand side of the interface, below the step title:
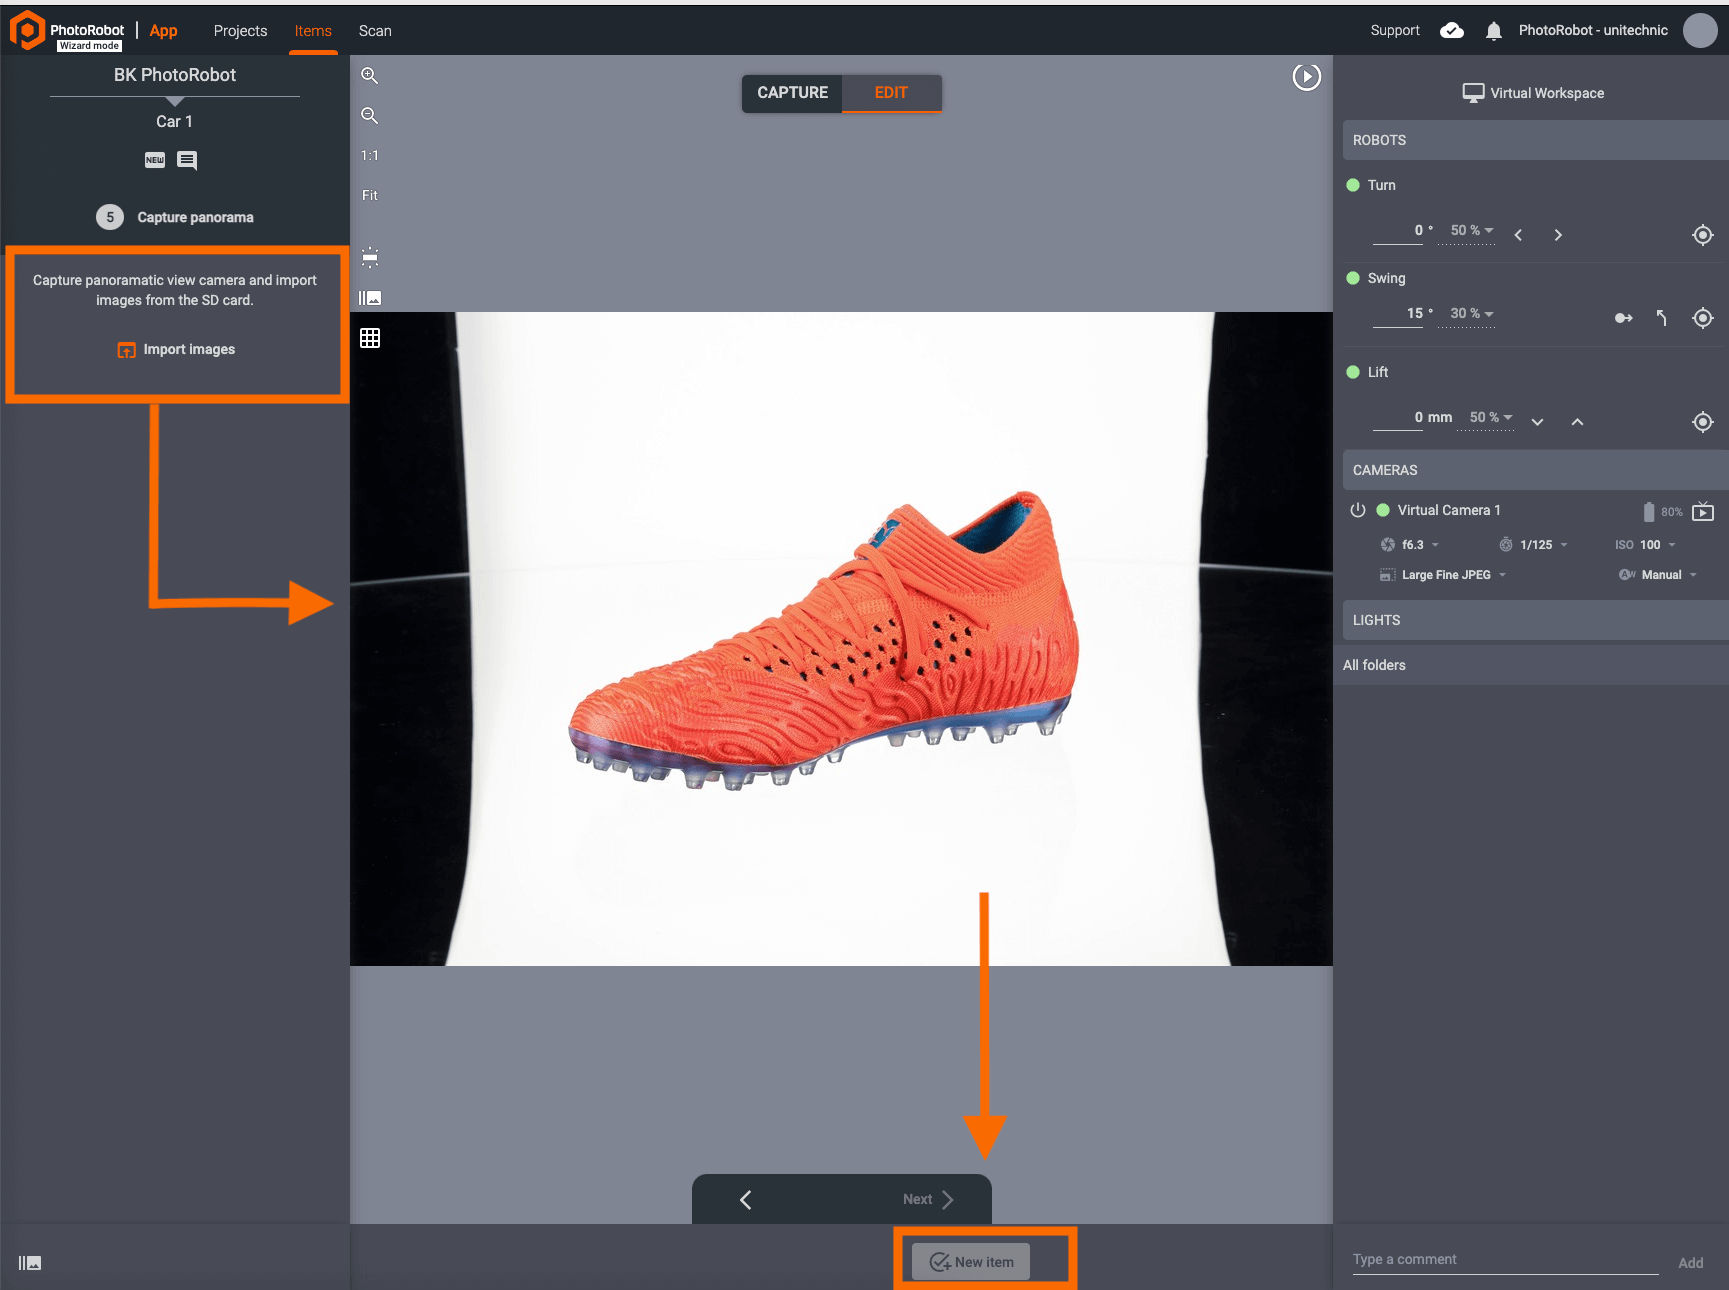
In some cases, the Wizard may also instruct the operator to take photos for example with a handheld camera, and then import the images before the Next option is available.
When complete with each stage, New item at the bottom of the interface completes the Wizard:
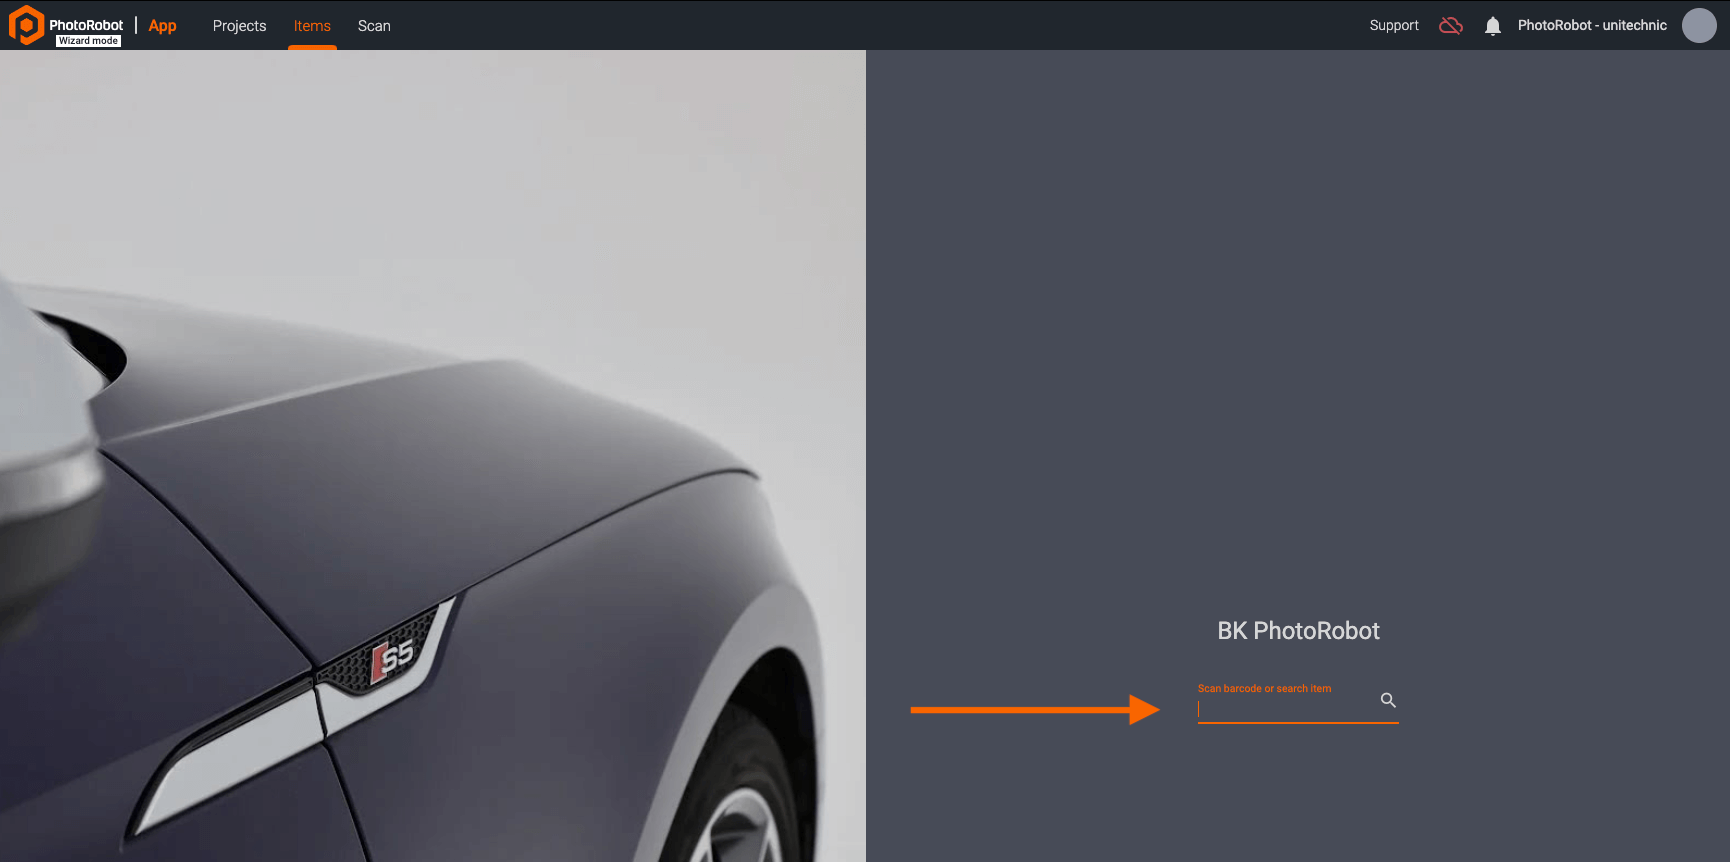
When finished, the user is returned to the Wizard start page. Here, they can exit the Wizard, or continue to the next item.
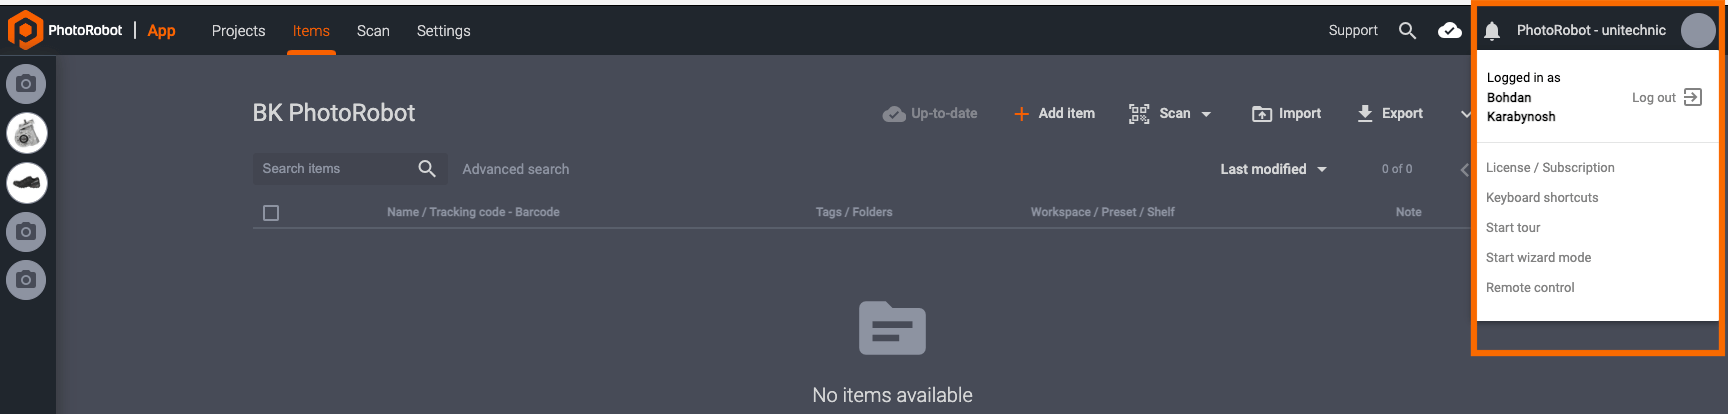
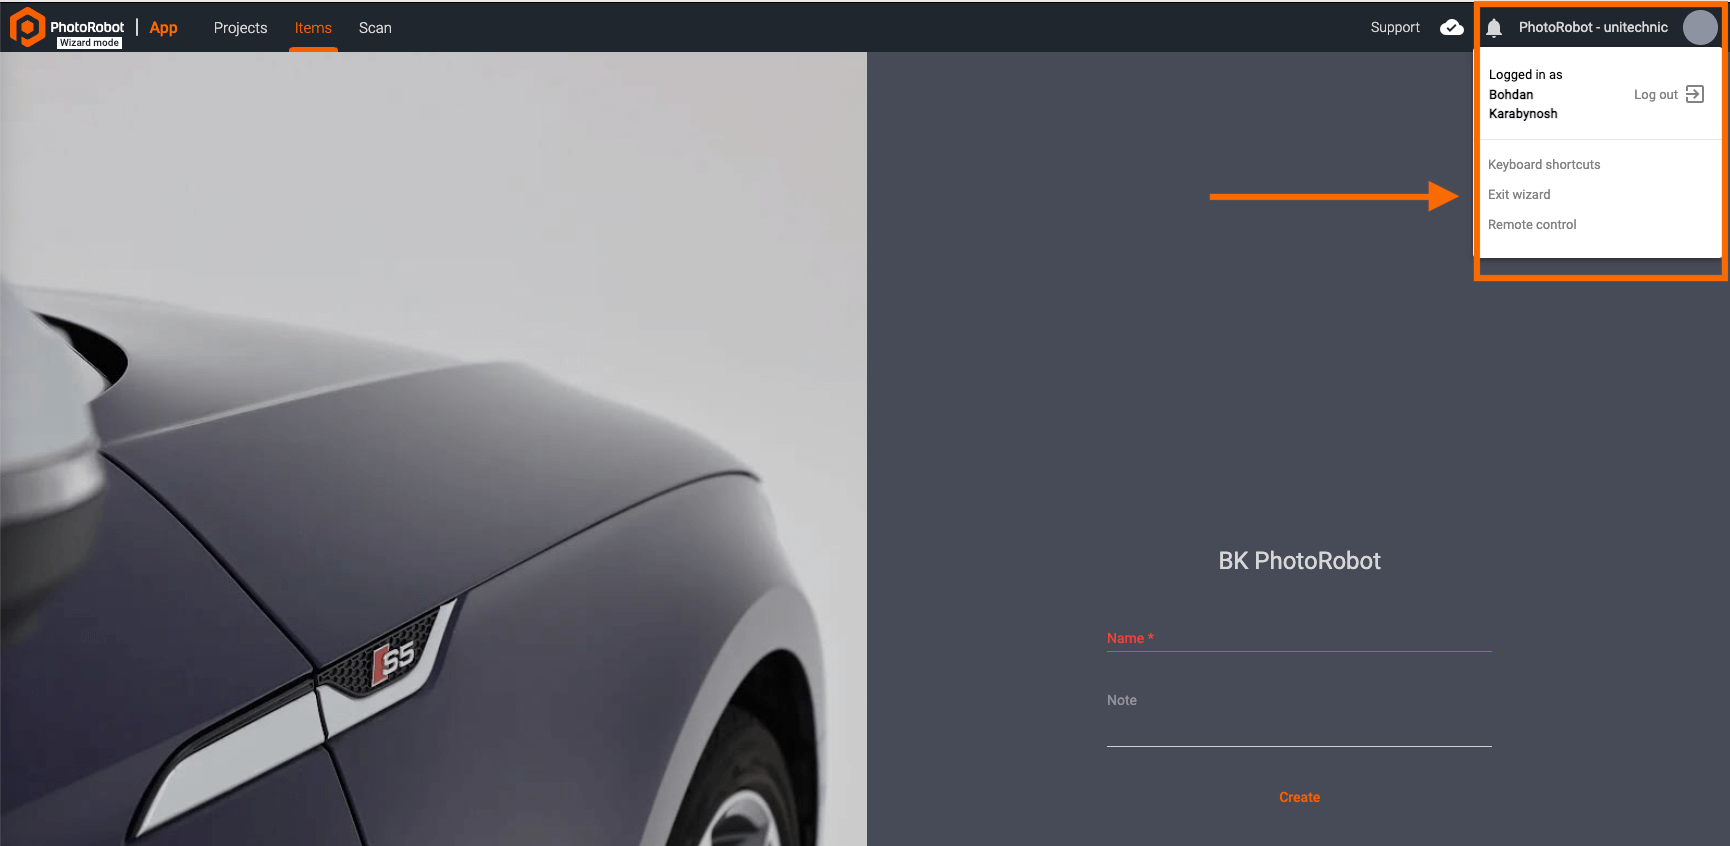
To exit the Wizard, click on the Account Icon in the top-right part of the interface, and click Exit wizard:
If continuing to another item existing in the system, it is also possible to load items to capture via Wizard settings by changing the first step to “type”: “select -item”:
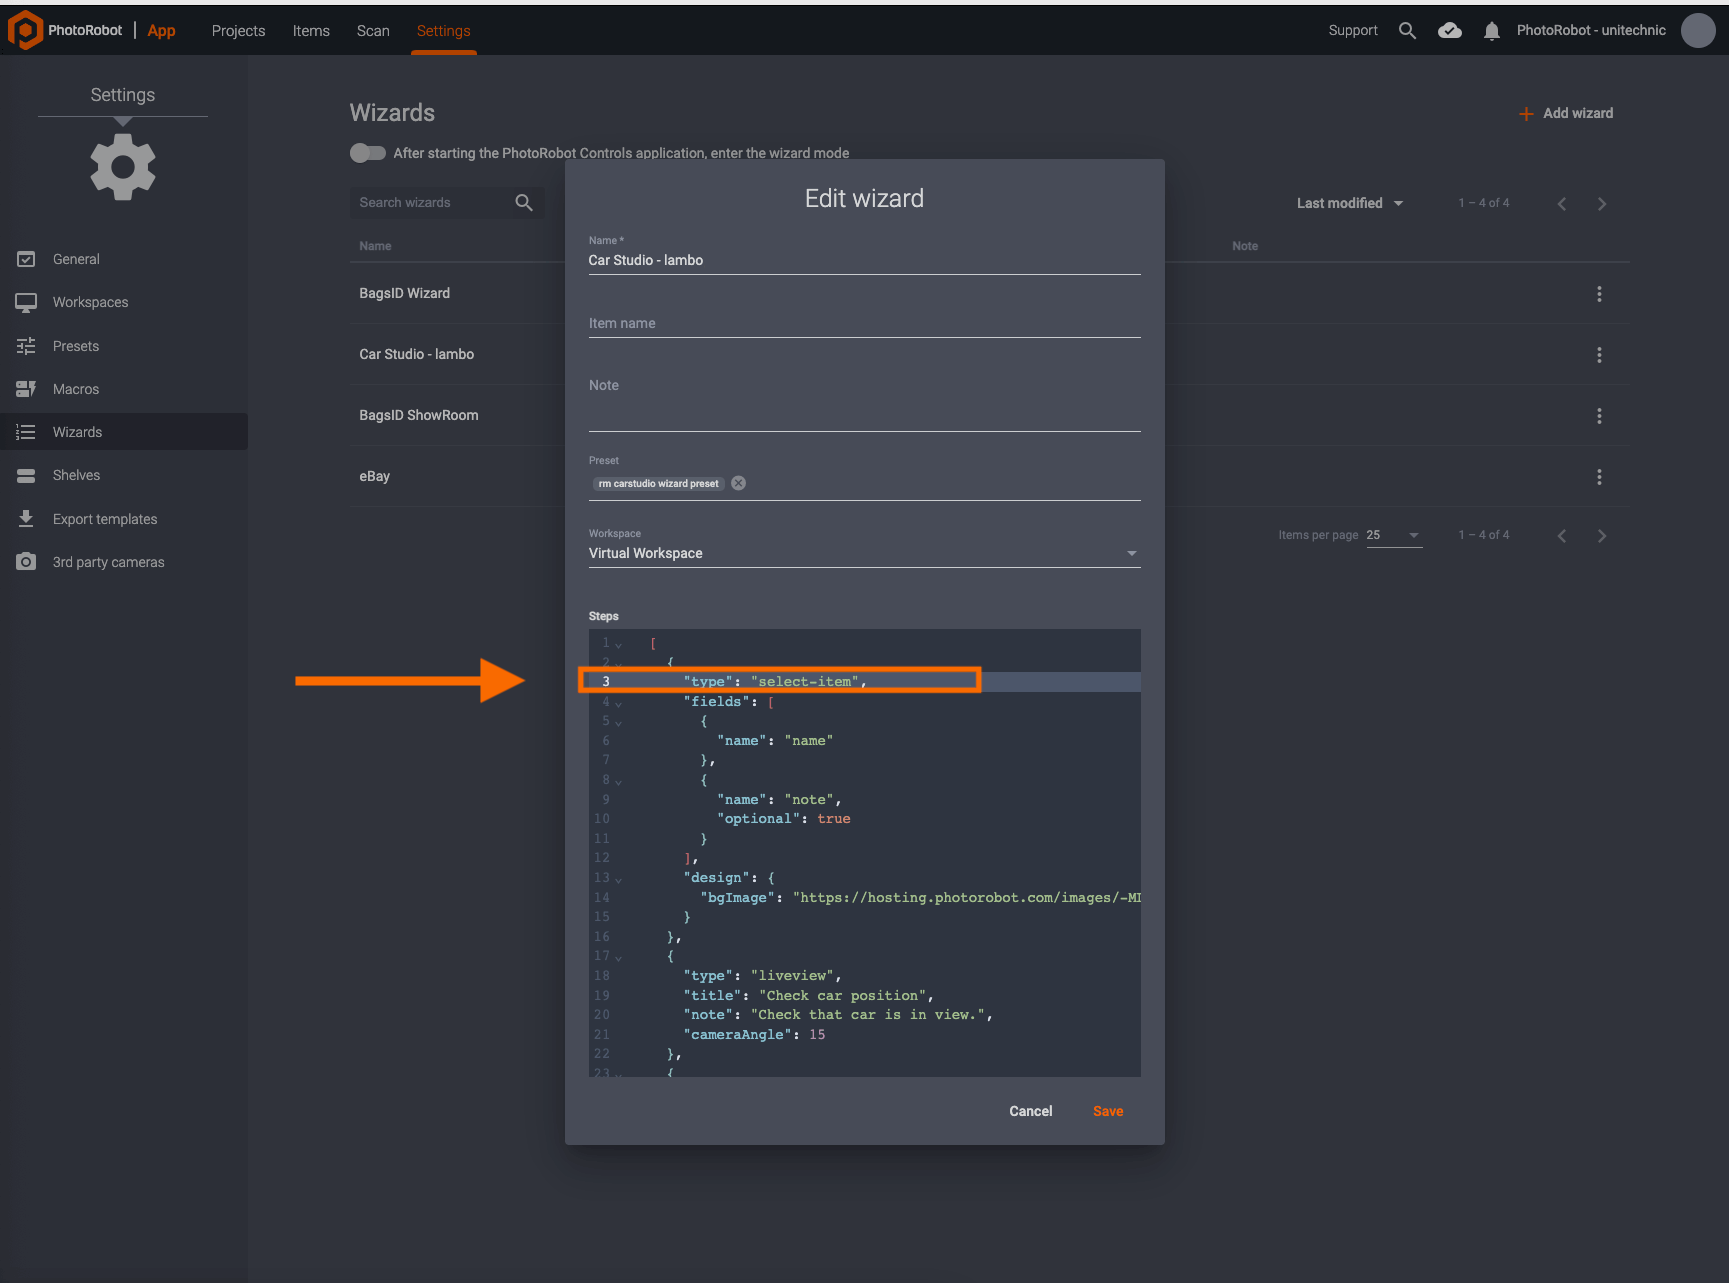
After configuration of “type”: “select -item”, users can then select items by entering the item name on the Wizard startup screen:
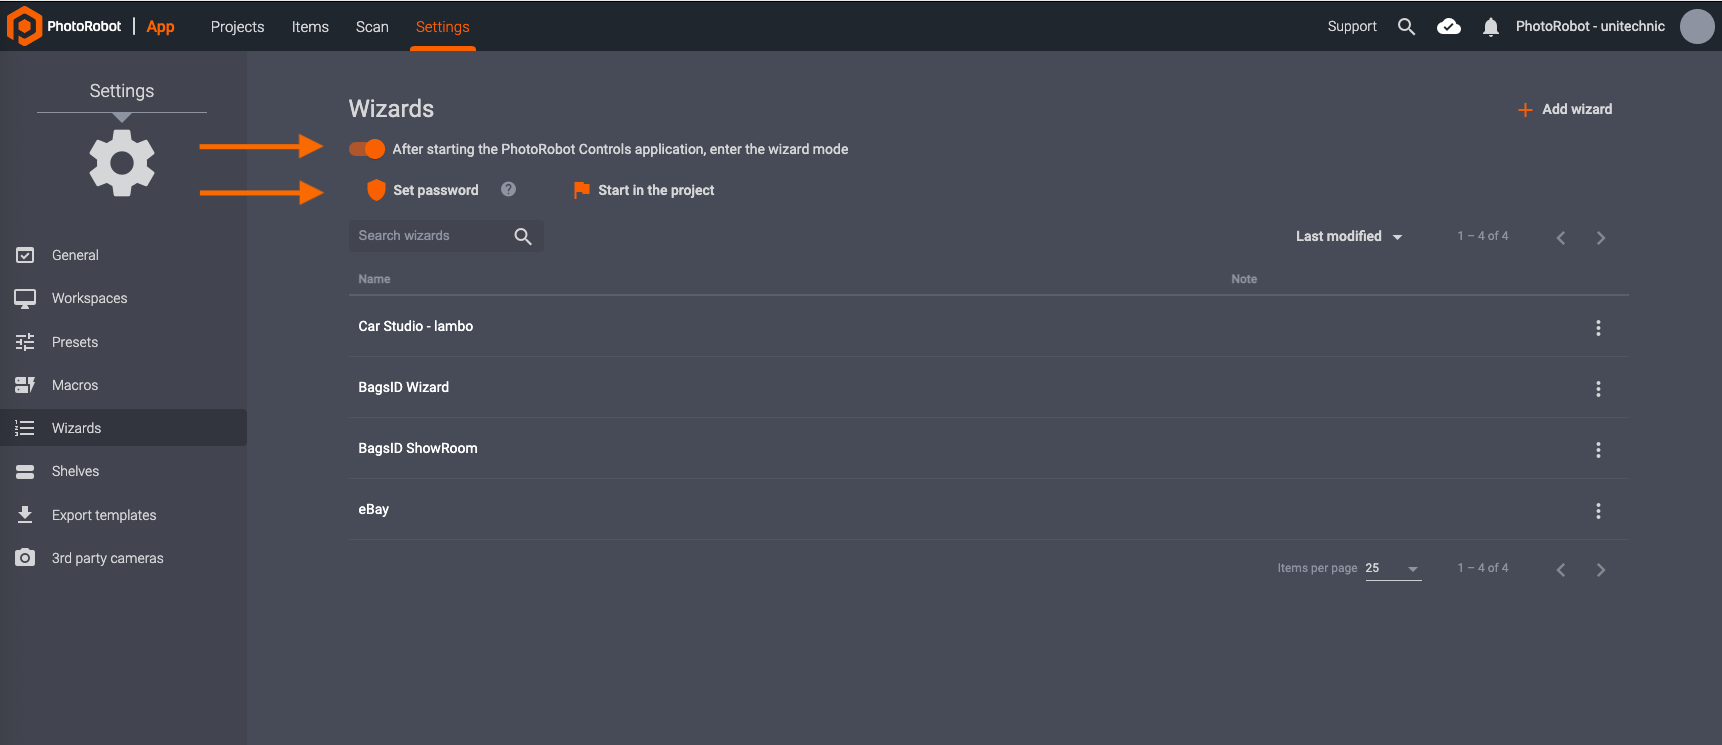
Finally, it is also possible to enable password protection for Wizards mode, or to designate a Project that will start by default in the Wizard. Find these options on startup of CAPP by navigating to Settings, and clicking on Wizards.
The top of the menu options provide a toggle on / off to enter wizard mode automatically after starting CAPP. Below this, users can click Set password to enable password protection.
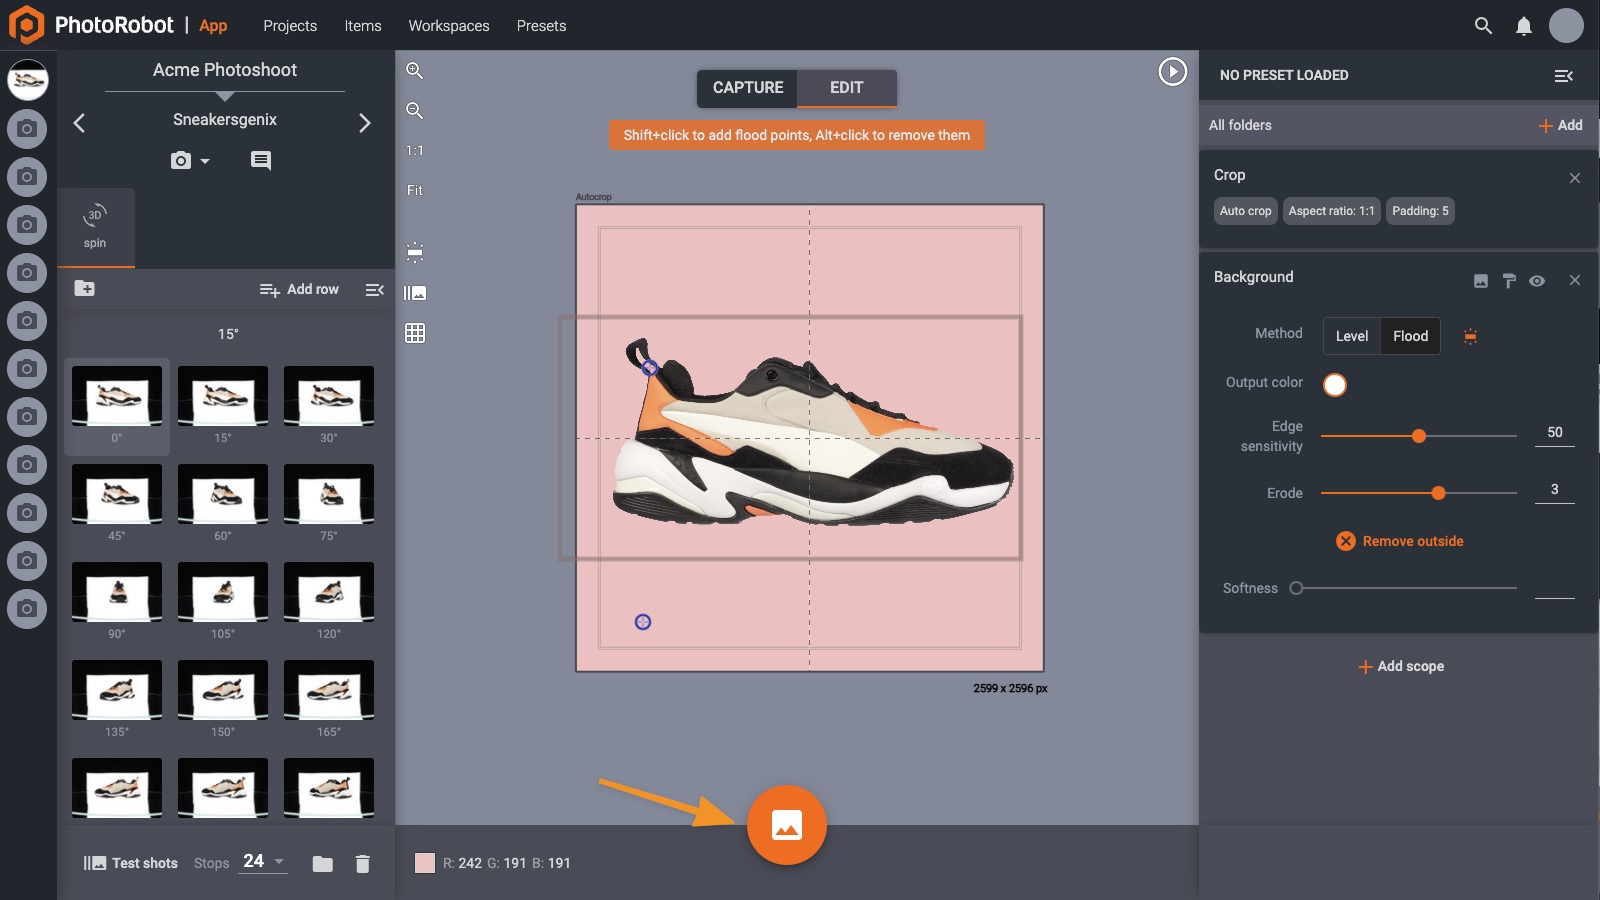
On the right side of the screen, you can add any number of editing operations:

Some of the most common editing operations are listed at the top: crop, center, and background.
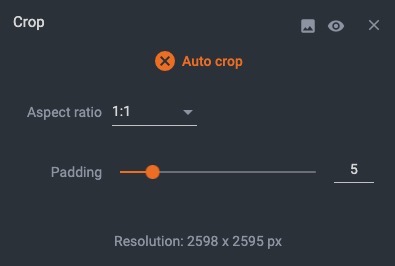
Crop - when cropping images, there are three main controls: the toggles for automatic cropping, aspect ratio, and padding (which controls how much space there is around the photographed object).
Center - even though most PhotoRobot machines are equipped with lasers that help with positioning objects on the surface, most images will need additional software centering. This is especially important for 360° spins. When getting started, it is recommended to keep the “auto center” function on, as seen in the picture below:

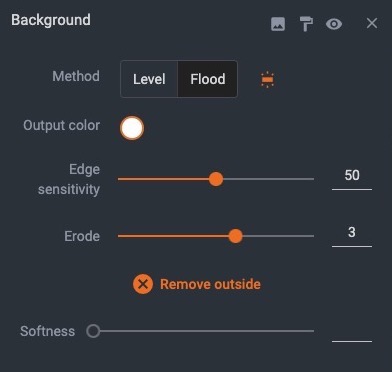
Background - this operation is used to adjust the background of the image, completely removing it if desired. Different results can be achieved by selecting the level method of background removal, the flood method, or freemasking.
With background removal by level, users utilize an RGB (red, green, blue) color of each pixel to remove colors above a certain threshold. This is advantageous when shooting products with a white backdrop, and for making an off-white background disappear.
To use the flood method, you must select at least one point outside the photographed object. Experiment with the settings until you are satisfied with the results.
Freemasking requires more configuration than level or flood methods, but can be one of the quickest and most exact methods. It does however require additional configuration of your lights to create main and mask images for background removal.
Remember that whether or not CAPP will be able to remove the background depends mainly on how the scene is lit. If you are unable to find settings that work to satisfaction, reshoot the images with different light settings.
When you are satisfied with your edit settings, apply the parameters by clicking the “apply” button, located where previously the “start” button appeared.
Once the progress bar reaches its end, your edits have been successfully applied to your images. If you are using CAPP without PhotoRobot Cloud services, your resulting images are stored in a folder structure on your local drive.
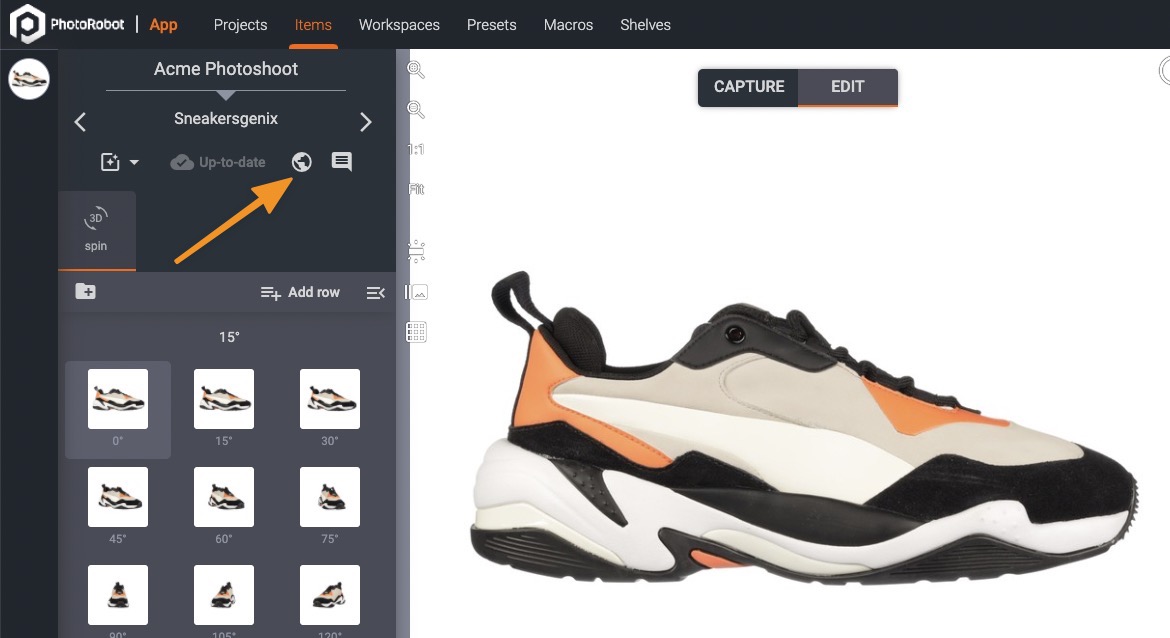
If using PhotoRobot Cloud hosting, files can also be found in the PhotoRobot cloud storage. To access these, click Open in the cloud in the Photos section at the top-left part of the screen.
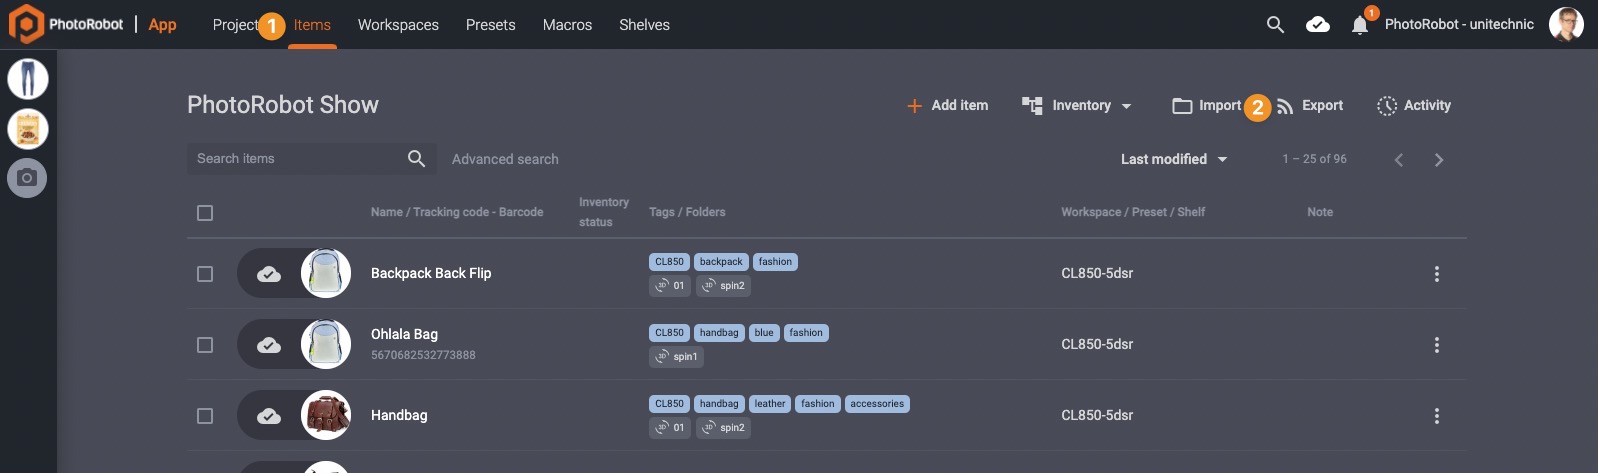
To export an item from CAPP, users can export to a local disk, or export to the PhotoRobot Cloud. Item export makes it possible to define items with custom naming conventions, specify image format, resolution, and various filename template variables.
To access Item export settings, go to the Items section, and click Export in the menu above the item list:
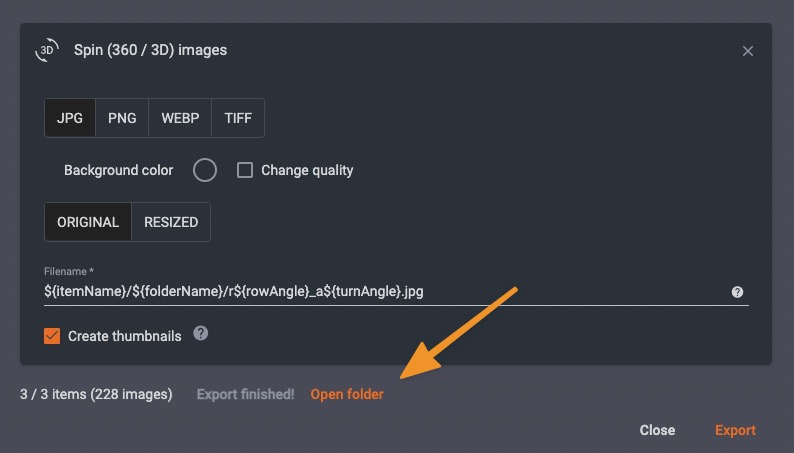
The following window will open, allowing you to change export settings:

Run the export process by clicking the Export button in the bottom right corner of this window.
When the export progress bar has reached its end, you can click Open folder to access your exported images.
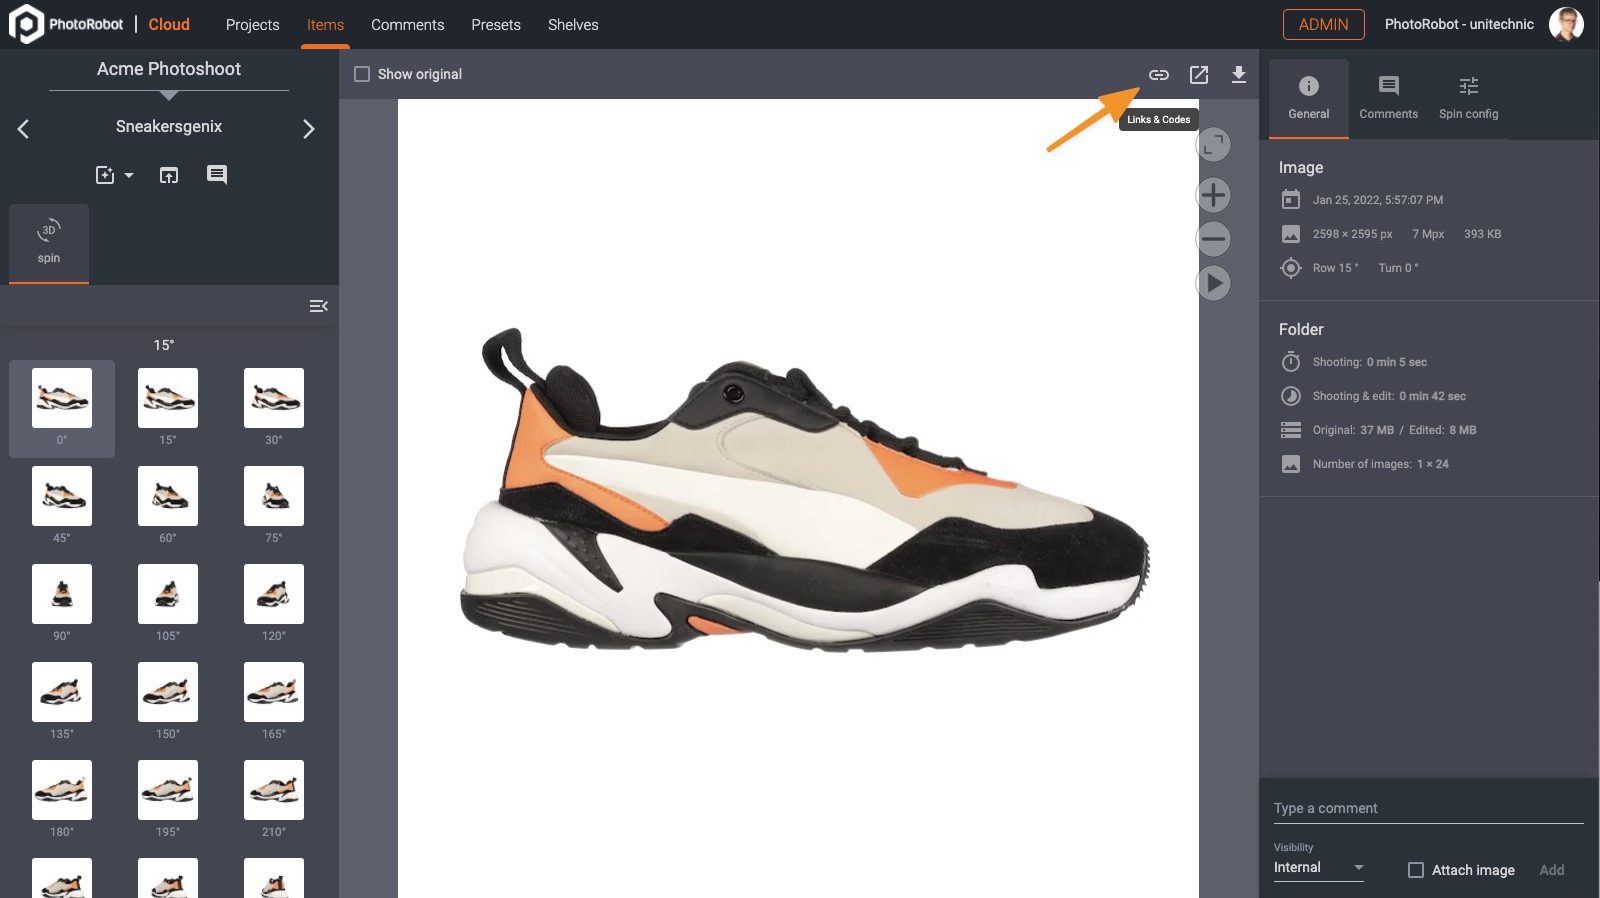
If publishing via PhotoRobot Cloud services, first open the item in the cloud. The interface displays the captured image. Click Codes & Links button:
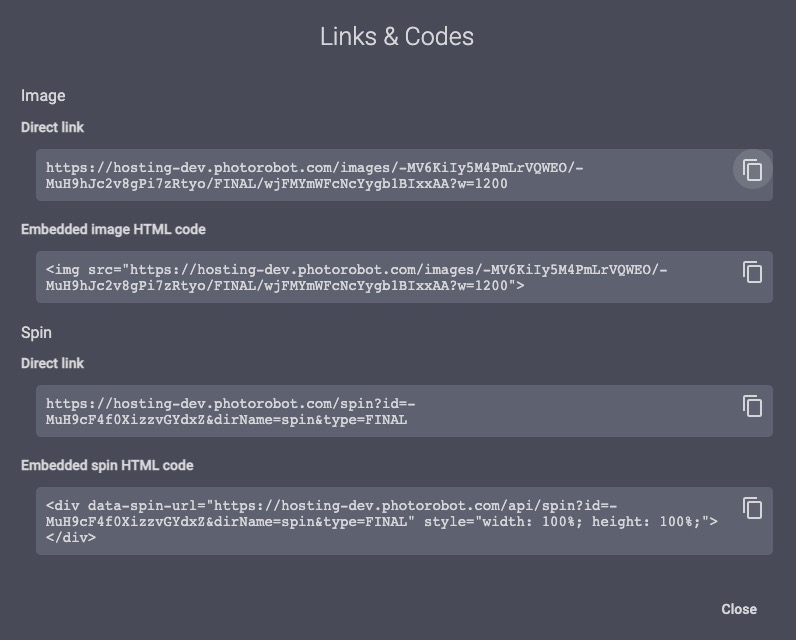
Copy the Direct link and paste it into your browser to view the image or spin. If satisfied, copy the Embedded spin HTML code. Paste this code onto your page to embed the spin for display.


